I once shipped 300 meters of a custom-dyed oatmeal linen-cotton to a designer in Portland. She received it, loved the hand feel, and cut it into a stunning collection of relaxed blazers. Three weeks later, she called me in a panic. Every single blazer had shrunk by nearly two inches across the back after the first dry cleaning. She was facing returns, chargebacks, and a ruined launch. I asked her one question: "Did you wash the sample before you cut?" There was a long silence on the line. She had done the drape test, the color check, the hand feel evaluation, but she had skipped the single most important test in the entire development process. The shrinkage test. That $12,000 mistake was entirely preventable with thirty minutes of work and a bucket of water.
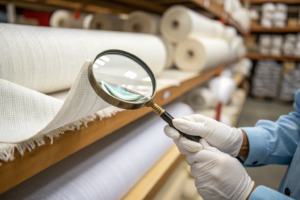
You test Fumao Fabric's cotton linen for shrinkage by cutting a precise square of the sample, measuring it exactly, subjecting it to the most aggressive washing and drying cycle the final garment is likely to encounter, and then re-measuring the dimensions. The difference between the original measurements and the post-wash measurements, divided by the original, gives you the shrinkage percentage. This is not a "nice to do" step. It is the difference between a garment that fits your customer forever and a garment that fits until the first laundry day. At Shanghai Fumao, we provide detailed pre-shipment shrinkage test reports for every batch using the AATCC 135 standard, but I still tell every client to run their own test in their own studio. Your washing machine is different from our lab machine. Your water temperature is different. Your drying method is different. The only shrinkage number that matters for your production is the one you generate yourself, on your equipment, with your process.
In this article, I'm going to walk you through the exact step-by-step protocol I teach to all my boutique and brand clients. It's the same method our QC lab uses, adapted for a home or studio environment with tools you already have. I'll explain why linen shrinks in the first place, how to simulate a worst-case customer wash, how to measure accurately, and what to do if the shrinkage is outside your acceptable tolerance. This is the most practical, immediately actionable article I've written. If you only run one test on your fabric, run this one.
Why Does Cotton Linen Fabric Shrink and How Much Is Normal?
Shrinkage isn't a defect. It's a physical property of plant-based fibers, and understanding why it happens will make you a better fabric buyer than 90% of your competitors. Cotton and linen are both cellulose fibers, and cellulose loves water. When a flax fiber absorbs moisture, it doesn't just get wet on the surface. The water molecules penetrate into the amorphous regions of the cellulose structure, forcing the long polymer chains apart and causing the fiber to swell radially. As the fiber gets fatter, it pulls itself shorter. This is called relaxation shrinkage, and it's completely normal. When the fabric was woven on the loom, the warp yarns were under high tension. That tension stretched the fibers slightly and locked them in place. The first time the fabric gets wet and the fibers swell, that locked-in tension releases, and the fabric contracts. Think of it like a spring that's been held compressed. When you release the clamp, the spring returns to its natural length. Water is the release clamp for linen.
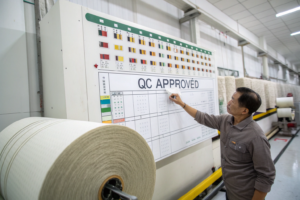
For our standard cotton-linen fabrics, a properly pre-finished batch should exhibit shrinkage of 2% or less in both warp and weft directions. Our premium shirting range, which undergoes additional compressive shrinkage treatment, typically tests at 1.5% or less. An unwashed, loomstate greige fabric can shrink 6% to 8% or more, which is why I never recommend buying greige fabric for direct garment production unless you have your own finishing capability. The key phrase here is "properly pre-finished." At Shanghai Fumao, every meter of fabric we ship has gone through a wet finishing process that includes a relaxation drying stage specifically designed to remove residual shrinkage. But no finishing process can remove 100% of the shrinkage potential without damaging the fiber structure. There's always a small residual amount, and the exact percentage varies slightly from batch to batch depending on the yarn tension during weaving, the humidity in the mill on the day the fabric was woven, and the specific parameters of the finishing machines. This is why you test every batch, not just every new quality.
Let me explain the difference between relaxation shrinkage and progressive shrinkage, because this distinction is important for garment longevity. Relaxation shrinkage happens once, the first time the fabric gets wet, and it's the release of the loom and finishing tensions I just described. Progressive shrinkage is a slower, ongoing process where the fabric continues to shrink slightly over multiple wash cycles as the fibers repeatedly swell and contract, gradually compacting the weave structure. Progressive shrinkage is much smaller than relaxation shrinkage—typically 0.5% to 1% over the first five washes—and it plateaus after that. A fabric that shows 2% relaxation shrinkage and 1% progressive shrinkage will eventually end up at about 3% total shrinkage. If you cut your garment without pre-washing the fabric, the customer's first wash will trigger the relaxation shrinkage, and the garment will shrink by that 2% to 3% all at once. If you pre-wash the fabric before cutting, the relaxation shrinkage happens in your studio, and the customer only experiences the tiny progressive shrinkage over subsequent washes. This is why many high-end brands pre-wash their yardage before cutting, especially for fitted garments where even 2% shrinkage can change the fit. I provide pre-washed fabric options for clients who want to skip this step, though it adds about 3% to the per-meter cost and about five days to the lead time. If you're interested in how different fibers compare, exploring how to understand fabric shrinkage rates across natural fibers like cotton, linen, and wool can give you valuable context for your sourcing decisions.
How Does the Yarn Spinning Method Affect Shrinkage Behavior in Linen Blends?
Not all linen yarns shrink the same way. The spinning method used to produce the yarn has a profound effect on how the finished fabric responds to water. There are two primary spinning methods for flax: wet spinning and dry spinning. In wet spinning, the flax roving passes through a trough of hot water at about 60°C immediately before entering the drafting zone of the spinning frame. The hot water softens the natural pectin gums that bind the flax fibers together, allowing the fibers to slide past each other and form a smoother, finer, more uniform yarn. Because the fibers are already fully swollen and lubricated during spinning, wet-spun linen yarns exhibit lower relaxation shrinkage in the finished fabric. Our premium shirting linens use wet-spun 60s Lea yarns for exactly this reason.
Dry spinning, which is more common in coarser linen yarns and is less expensive, spins the flax without the water bath. The fibers are less aligned, the yarn is hairier and more irregular, and the finished fabric retains more internal stress from the spinning process. When this fabric hits water, the release of that internal stress produces higher relaxation shrinkage. A dry-spun 24s Lea linen fabric might show 4% to 5% shrinkage if not properly finished, while a wet-spun 60s Lea of the same construction might show only 2%. The cotton component in the blend also contributes its own shrinkage behavior. Cotton fibers are naturally twisted and kinked, and they also swell when wet. A cotton-linen blend inherits the shrinkage characteristics of both fibers, which is why our Stretch Basic with its 70% cotton content requires more aggressive compressive finishing to achieve the same sub-2% shrinkage as our 55% linen mechanical stretch. The blend ratio isn't just an aesthetic or cost decision. It's a shrinkage behavior decision, and you should factor this into your fabric selection.
What Is the Step-by-Step Home Test Protocol for Fabric Shrinkage?
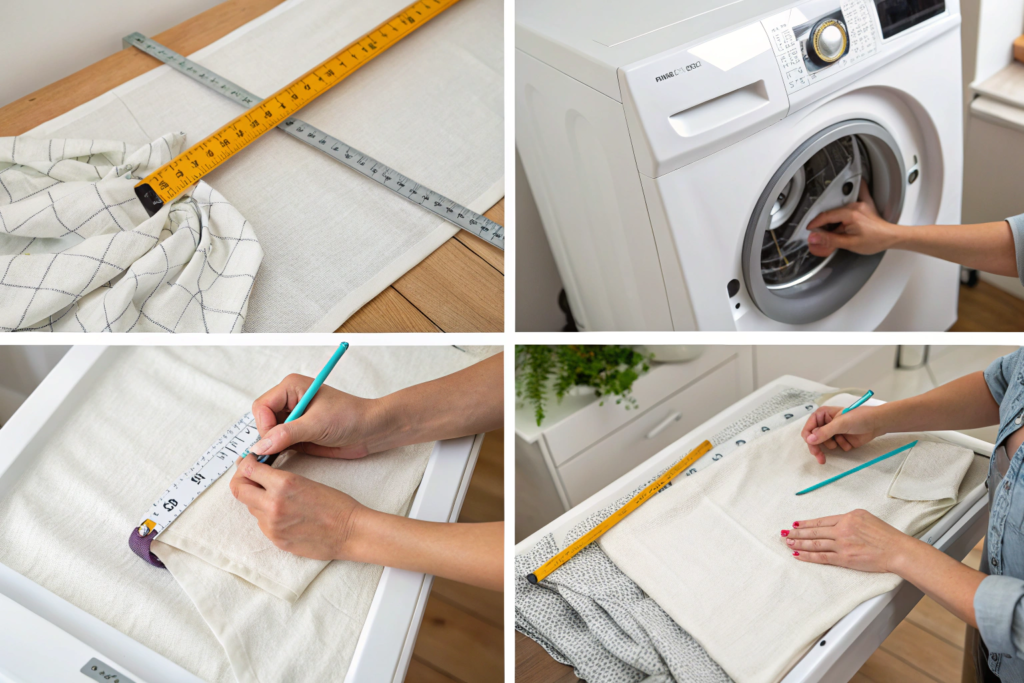
Alright, let's get practical. You've received your sample swatches from us, you've done the hand feel and color evaluation, and now it's time for the shrinkage test. This protocol simulates the most aggressive home laundry conditions your customer is likely to use. I've designed this method over years of working with small brands who don't have access to a textile lab, and it correlates well with the AATCC 135 results from our formal testing. The tools you need are minimal: a fabric marker or a ballpoint pen, a ruler or a tape measure that shows millimeters, a notebook, a washing machine, and a drying rack. If you have a clothes dryer, you'll use that too, but I'll explain both protocols.
The procedure has five steps, and you need to follow them in order. Step one: cutting and marking. Cut a piece of your cotton linen fabric at least 40cm by 40cm. Don't use a tiny swatch. The larger the sample, the more accurate your measurement will be because small measurement errors on a small sample become large percentage errors. Using your ruler and a pen, draw a precise 30cm square on the fabric. Mark the corners clearly. Measure the square in both directions—warp and weft—and write down the exact measurements. The warp runs parallel to the selvedge. The weft runs across. If you don't know which is which, look at the selvedge edge; the yarns running parallel to it are the warp. Step two: the wash. Set your washing machine to the hottest water setting and the longest, most aggressive cycle you reasonably expect your customer to use. For most cotton-linen garments, this is a warm or hot cycle at 40°C to 60°C. Add a standard amount of regular laundry detergent. Don't use fabric softener. Throw the swatch in with a few other items—old towels work well—to simulate a real load where the fabric gets mechanical agitation against other textiles. Step three: the dry. If your customer is likely to use a tumble dryer, you must test with a tumble dryer. Dry the swatch on the hottest setting the garment care label would allow. If your brand recommends hang drying, then hang dry the swatch. If you want to know both outcomes, cut two swatches and test both methods. Step four: the re-measure. Once the swatch is completely dry, lay it flat on a table. Don't stretch it. Don't iron it. Just lay it down naturally. Using your ruler, measure the square again in both directions. Record the numbers. Step five: the calculation. Subtract the post-wash measurement from the pre-wash measurement. Divide that number by the pre-wash measurement. Multiply by 100. That's your shrinkage percentage.
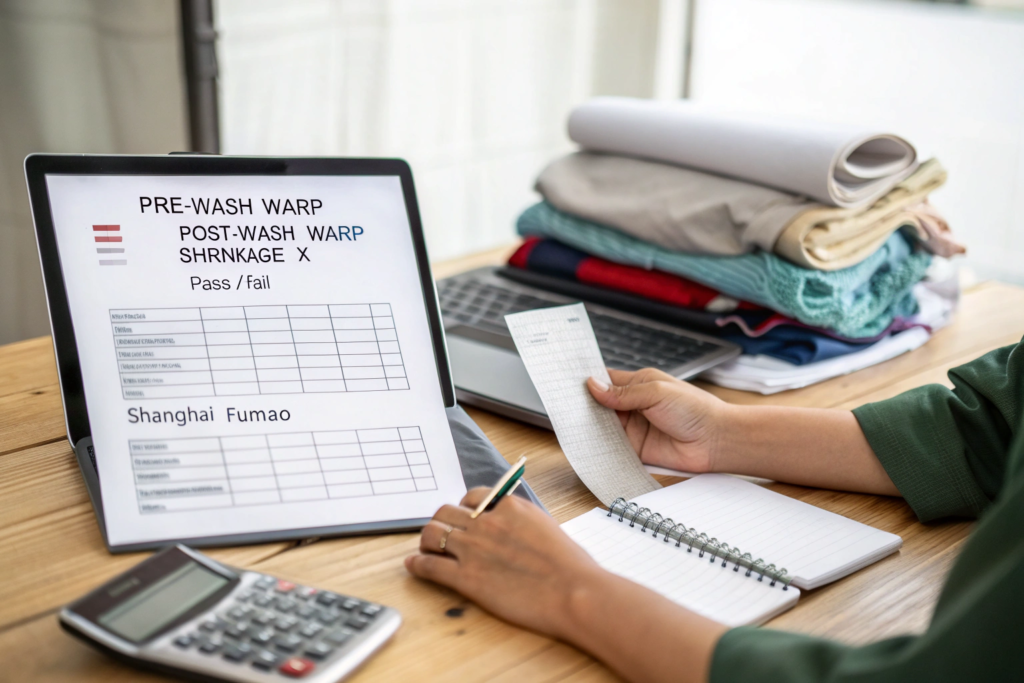
Let me walk through a real example so you can see the math. Suppose your pre-wash warp measurement was 30.0cm exactly. After washing and drying, the warp measurement is 29.4cm. The difference is 0.6cm. Divide 0.6 by 30.0, and you get 0.02. Multiply by 100, and you get 2% shrinkage. In the weft direction, your pre-wash was 30.0cm and the post-wash is 29.1cm. That's 0.9cm of shrinkage, or exactly 3%. Your total shrinkage for this fabric sample is 2% in the warp and 3% in the weft. If your garment specifications allow for a maximum of 3% shrinkage, this fabric passes in the warp but fails in the weft, and you need to have a conversation with me about adjusting the finishing or compensating the pattern. The weft typically shrinks more than the warp in woven fabrics because the warp yarns were under tension during weaving and were already stretched out, while the weft yarns were inserted in a more relaxed state and have more latent shrinkage potential.
How Should You Test Shrinkage for Garments That Will Be Commercially Dry Cleaned?
Not every cotton-linen garment goes in a home washing machine. If you're producing tailored blazers, structured dresses, or any garment with a "Dry Clean Only" care label, your shrinkage test protocol needs to change. The customer won't be throwing this garment in a Maytag. They'll be taking it to a dry cleaner, and the dry cleaning process uses perchloroethylene or a hydrocarbon solvent instead of water. These solvents don't cause cellulose fibers to swell the same way water does, so the relaxation shrinkage mechanism is largely avoided. However, dry cleaning does involve mechanical agitation and heat during the pressing stage, and these can cause some dimensional change.
To simulate dry cleaning at home, you can't really replicate the process without access to solvent. The best approximation is to take your swatch to a commercial dry cleaner and ask them to clean it on their standard cycle. Most local dry cleaners are happy to do this for a small fee, especially if you explain it's for a garment production test. Run the swatch through three cycles and measure after each one. The shrinkage from dry cleaning is typically much lower than from wet washing—0.5% to 1.5% for a properly finished cotton-linen—but you need to verify this on your specific fabric. Some finishes that are water-soluble will be stripped by dry cleaning solvents, changing the hand feel and potentially the dimensions. A pre-washed linen from our mill will typically perform very similarly in both wet wash and dry clean because the water-soluble components and the relaxation shrinkage have already been addressed in our finishing process. For a comprehensive understanding of care methods, you might also want to review how to properly test fabric for both wet washing and dry cleaning shrinkage to ensure your care labels are accurate.
What Tools Do You Need for Accurate Shrinkage Measurement Without a Lab?
A professional textile lab uses a conditioned environment at 65% relative humidity and 20°C, a calibrated metal ruler, and sometimes an automatic measuring device. You don't have any of that, and that's okay. You can get a measurement that's within 0.5% of the lab result with a few simple practices. The most common source of error in home shrinkage testing is not the tools. It's the fabric not being fully relaxed before you take the initial measurement. If your sample arrived in the mail tightly folded in an envelope, it's been under compression and tension for several days. The fibers are not in their natural relaxed state. Before you draw your square and take your pre-wash measurement, you need to let the fabric rest. Spread it out flat on a table in a room with normal humidity for at least four hours, preferably overnight. This allows the fibers to equilibrate with the ambient moisture and the yarns to relax from any folding stress.
The second most common error is stretching the fabric when you measure it. Linen has a crisp hand and can be coaxed into lying flat with a little tension, but if you pull it even slightly while measuring, you're adding length that isn't really there. The correct technique is to lay the ruler on the fabric, not the fabric on the ruler. Place the ruler gently on top of the swatch and read the measurement without pressing down or smoothing the fabric. If the fabric has wrinkles that prevent the ruler from lying flat, you can lightly steam the wrinkles out, but let the fabric cool and relax completely before measuring. The third error is measuring only one spot. Fabric doesn't shrink perfectly uniformly. I recommend drawing three separate squares on different parts of the swatch and averaging the results. If the three squares give you warp shrinkage of 1.8%, 2.1%, and 2.0%, your average is 1.97%, which rounds to 2%. That's a much more reliable number than a single measurement.
How Do You Interpret Your Shrinkage Test Results and Take Action?
You've run the test. You have your numbers. The warp shrunk 2.1%. The weft shrunk 3.4%. Now what? The first thing to understand is that your numbers will almost certainly differ from the numbers on the test report I sent with the fabric. This doesn't necessarily mean my report was wrong or your test was flawed. Different washing machines, different water temperatures, different drying methods, and different ambient humidity all affect the result. A discrepancy of 0.5% to 1% between your home test and our lab test is normal and expected. The question is whether the shrinkage you measured is acceptable for your specific garment design and your customer's expectations.
The interpretation framework I teach my clients has three tiers. Tier one: shrinkage under 2% in both directions. This is excellent. Your fabric is properly finished and you can cut your production with confidence. If you're doing a fitted garment, you might still want to add a tiny shrinkage allowance to your pattern—maybe 0.5%—just as a safety margin, but it's not strictly necessary. Tier two: shrinkage between 2% and 3.5%. This is manageable. The fabric is not defective, but you need to compensate for the shrinkage in your pattern making. If the weft shrinks 3%, you add 3% to the width measurements on your pattern pieces. The garment will be slightly oversized when first sewn, but after the first wash, it will shrink to the correct dimensions. You must also communicate this to your production team so they don't think the patterns are wrong. Tier three: shrinkage above 3.5%. This is a problem. Something has gone wrong in the finishing process, and the fabric has excessive residual shrinkage. Contact me immediately with your test results. I'll pull the retained sample from our warehouse, re-test it, and cross-reference with our internal QC data. If the batch genuinely has excessive shrinkage, we'll either re-finish it to bring the shrinkage down or we'll discuss a remake.
Let me share a specific case from late 2024 that illustrates why this tier system matters. A menswear brand in Toronto was developing a tailored linen-cotton trouser. Their home test on our Stretch Basic 70/28/2 showed 2.8% warp shrinkage and 3.2% weft shrinkage. These numbers fell into Tier Two—manageable with pattern compensation. Their pattern maker added the appropriate ease, and the pre-production samples fit perfectly after washing. The brand owner was initially nervous about the numbers, but the trousers launched successfully, and the return rate for fit issues was under 1%. Six months later, another client using the exact same fabric ran the test on a different washing machine and got 2.2% warp and 2.5% weft. Same fabric, different machine, different numbers. Both sets of results were valid for the equipment they were tested on. The lesson is that your shrinkage test tells you how the fabric behaves in your customer's world, not in a laboratory. Base your pattern decisions on your own data, not on my report.
When Should You Pre-Wash Your Yardage Before Cutting, and When Is It Unnecessary?
Pre-washing yardage is the nuclear option for shrinkage control. You basically trigger all the relaxation shrinkage before you cut, so the garment dimensions stay stable through the customer's laundry. It's the safest approach, but it adds time, cost, and complexity to your production. You're essentially becoming a mini finishing plant. The fabric must be washed in manageable lengths, dried flat or tumble-dried, and then re-rolled. The washing can change the hand feel slightly, and the fabric may need to be pressed before cutting to remove wrinkles. Pre-washing also consumes water and energy, which may conflict with your brand's sustainability messaging if not handled thoughtfully.
I recommend pre-washing in three specific scenarios. Scenario one: your garment has a very close, precise fit with small tolerances. Think a fitted bodice, a tailored jacket, or anything with negative ease where a 2% shrinkage would visibly alter the fit. Scenario two: your shrinkage test showed numbers in Tier Two (2% to 3.5%) and you don't want to complicate your pattern making with shrinkage allowances that might confuse your production team. Pre-washing eliminates the variable entirely. Scenario three: you're producing a small batch where the cost of pre-washing is manageable, and the risk of a single customer complaint about shrinkage outweighs the convenience of cutting unwashed fabric. For large production runs with relaxed silhouettes and Tier One shrinkage numbers, pre-washing is usually unnecessary. The cost and time aren't justified by the marginal improvement in dimensional stability. I offer pre-washed fabric from our mill for clients who want the benefit without the hassle. We run the yardage through an industrial wash-and-dry cycle, re-inspect it, and ship it ready to cut. The lead time increases by about a week, and the cost increases by about 3% to 5%, but many of my high-end clients find this well worth it for the peace of mind. To see how other brands approach this production decision, exploring how pre-washing fabric before garment construction affects production timelines and final product quality is a useful reference point.
How Do You Adjust Your Pattern and Tech Pack Based on Shrinkage Data?
If you choose not to pre-wash, you must communicate the shrinkage data to your pattern maker and your factory. This is not optional. A pattern that's cut exactly to the garment's finished measurements, using fabric that will later shrink 2.5%, produces a garment that's 2.5% too small. The adjustment is a simple calculation, but it must be applied consistently across all pattern pieces. For the warp direction, which typically runs vertically on the garment, you add the shrinkage percentage to all vertical measurements. If the bodice front length is 60cm and the warp shrinkage is 2%, the pattern piece should measure 61.2cm. For the weft direction, which runs horizontally, you add the weft shrinkage percentage to all horizontal measurements.
The tech pack must clearly state the expected shrinkage and the compensation method. I recommend including a specific section in your tech pack called "Fabric Shrinkage Allowance" with the exact percentages for warp and weft, and a note that these percentages have already been applied to the pattern. This prevents the factory from second-guessing your measurements. It also provides a record if a quality issue arises later. One of my clients, a contemporary brand in Los Angeles, includes a small shrinkage test swatch with every production order they send to their factory. The factory runs a quick wash test on the swatch, verifies the shrinkage matches the tech pack, and then proceeds with cutting. This extra step adds a day to the pre-production timeline but has virtually eliminated shrinkage-related quality claims from their customers. For more on documentation best practices, you might find it helpful to learn how to document fabric shrinkage specifications in garment tech packs for accurate production communication.
Conclusion
The shrinkage test is the cheapest insurance policy you will ever buy for your fashion brand. A fabric marker, a ruler, and an hour of your time will tell you whether that beautiful cotton-linen sample is going to deliver a garment that fits for years or a garment that fits until the first laundry day. I've walked you through the entire protocol: cutting a precise square, marking it clearly, washing it aggressively, drying it realistically, and measuring it accurately. I've explained why linen shrinks—the fiber swells radially and contracts lengthwise when water penetrates the cellulose structure—and what numbers you should expect. Two percent or less is excellent. Two to three and a half percent is manageable with pattern compensation. Above three and a half percent is a conversation you need to have with me immediately.
The most important thing I want you to take away from this article is that your shrinkage test is the truth. Not my lab report. Not the industry average. Not what your previous supplier's fabric did. Your test, on your equipment, with your process. Run the test on every new fabric quality you develop, and run it again on the first meter of every bulk shipment you receive. Consistency comes from verification, not from trust. The brands I've worked with for a decade don't have shrinkage problems not because my fabric is magically different, but because they test every batch and they adjust their patterns accordingly. They treat shrinkage not as a quality failure but as a manageable variable. That mindset shift is what separates professionals from hobbyists.
If you're testing one of our cotton linen fabrics and your numbers are outside the expected range, don't panic. Contact us. Our Business Director, Elaine, handles all technical quality inquiries. She can pull the retained sample from your batch, review our internal QC data, and help you determine whether the issue is a process variable on your end or a finishing issue on ours. In either case, she'll work with you to find a solution—whether that's a re-finish, a remake, or guidance on pattern compensation. Reach out to her at elaine@fumaoclothing.com with your test results and your order reference number. Let's make sure your garments fit, wash after wash.