A container of fabric is basically a metal box floating through a tropical greenhouse for three weeks. If you’ve never seen what mold does to a roll of navy suiting during a summer transpacific crossing, count yourself lucky. I have, and it’s not pretty. The fabric arrives looking like a science experiment—grey-green spotting, that musty smell that never completely washes out, and a client who is absolutely justified in refusing the shipment. In 2019, we lost about $8,000 on a container of viscose lining to Houston because the shipper stuffed the rolls into standard poly bags with no desiccant, and a temperature swing halfway across the Pacific turned the inside of those bags into a condensation chamber. The client sent photos, and I could practically smell them through the screen. That was the day I stopped treating packaging as an afterthought and started treating it as a critical quality process.
Mold prevention during sea transit is a battle against physics, and the physics is unforgiving. Warm, humid air trapped inside packaging condenses when the container temperature drops at night or in cooler latitudes. That condensation water soaks into the fabric, and any organic material—cotton sizing, viscose fibers, even dust on the fabric surface—becomes mold food. The solution is a combination of three barriers: a moisture barrier to prevent humid ambient air from reaching the fabric, an internal desiccant system to absorb whatever moisture is already trapped inside the packaging, and a mechanical barrier on the container itself to prevent condensation from the container ceiling from dripping onto the rolls. Miss any one of these three barriers, and you’re rolling the dice. Hit all three, and your fabric arrives in the same condition it left the factory.
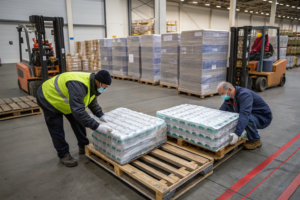
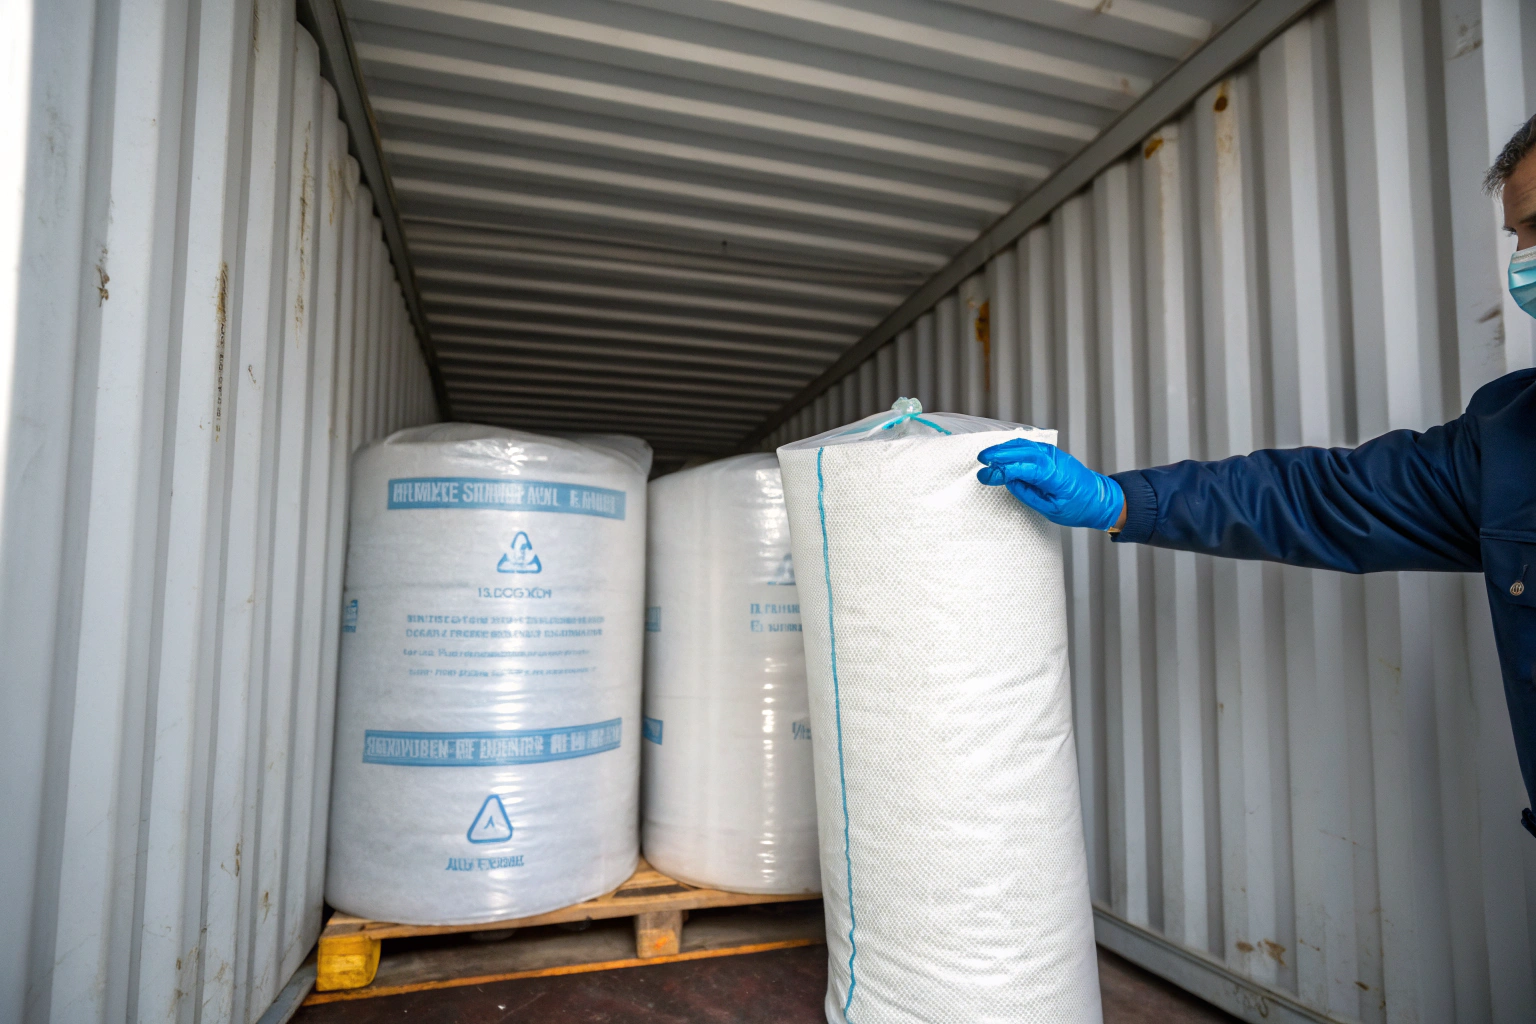
At Shanghai Fumao, we ship containers to humid ports like Miami, Singapore, and Hamburg year-round, and our mold claim rate is effectively zero. Not because we’re lucky, but because we’ve engineered the packaging process through trial and error over two decades. The materials, the procedures, and the container loading sequence are all standardized and verified at our packing facility. Let me walk you through the exact system.
Why Is Vapor-Barrier Polyethylene Better Than Standard Poly Bags for Ocean Freight?
Standard poly bags are dust covers, not moisture barriers. The polyethylene used in standard clear garment bags and generic roll packaging is low-density material that breathes. Water vapor molecules are small enough to pass through the film over time. If the ambient air inside a container reaches 90% relative humidity—which it absolutely will on a summer sailing through the tropics—that moisture will gradually migrate through a standard poly bag and equilibrate with the air inside the package. The fabric inside becomes as humid as the container air outside. When the temperature drops, condensation forms on the fabric itself.
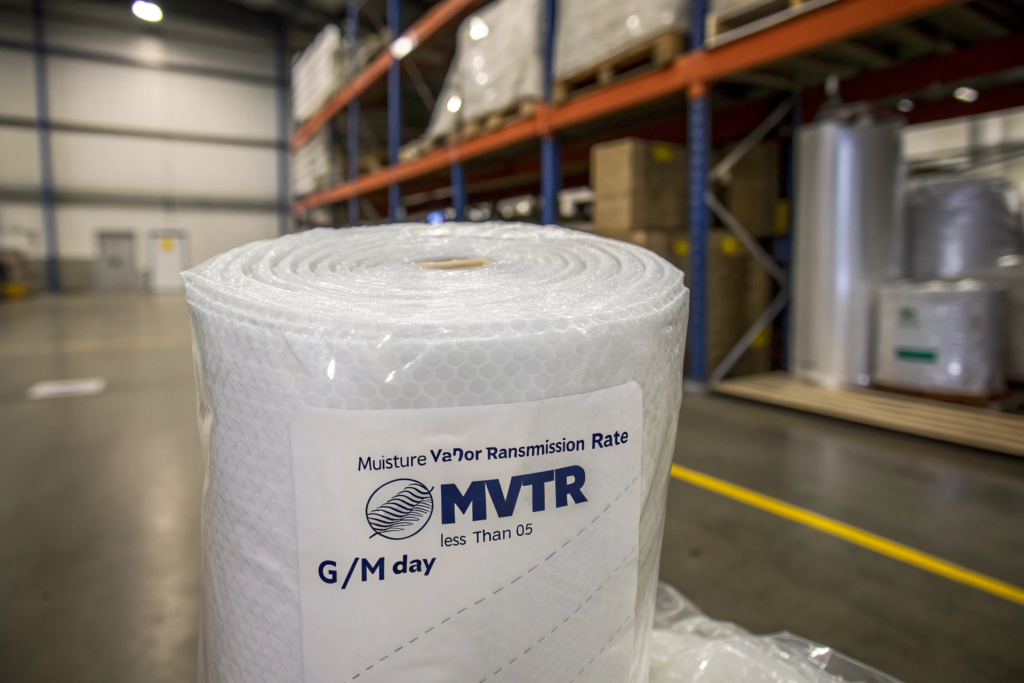
Vapor-barrier polyethylene is a different material. It’s typically a multi-layer film with a metallized or high-density core layer that blocks moisture vapor transmission. The industry measures this as the Moisture Vapor Transmission Rate, expressed in grams per square meter per 24 hours. Standard LDPE bags have an MVTR of 15-25 g/m²/day. Vapor-barrier bags have an MVTR of less than 0.5 g/m²/day. That’s a 30 to 50 times reduction in moisture migration. In practical terms, a fabric roll sealed in a proper vapor-barrier bag with desiccant inside will maintain its internal humidity at a safe level for the entire voyage, regardless of the container’s ambient humidity, because almost no new moisture is entering the package. The desiccant only needs to absorb the moisture that was trapped inside when the bag was sealed, plus the tiny amount that permeates through the barrier over time. It doesn’t need to fight a continuous influx of humid air through a leaky package wall.
Standard poly is a dust cover. Vapor-barrier poly is a moisture wall. The material cost difference is about 15 cents per roll. The mold claim savings are thousands.
The cost premium for vapor-barrier bags is modest—roughly 10-20 cents per linear meter of bag material compared to standard LDPE—and the incremental cost per fabric roll is negligible relative to the value of the fabric and the cost of a mold claim. We switched our entire export packaging to vapor-barrier bags after the 2019 incident, and the packaging material cost increased by about $80 per container. One avoided mold claim pays for a decade of vapor-barrier bags. The specification we use is a 3-layer co-extruded PE film with an EVOH barrier layer, minimum thickness 80 microns, with an MVTR below 0.3 g/m²/day. This is over-engineered for most shipments, but over-engineering is the point when the consequence of failure is an entire container written off.
What Is the Ideal Desiccant Type and Quantity for a 40-Foot Container of Fabric?
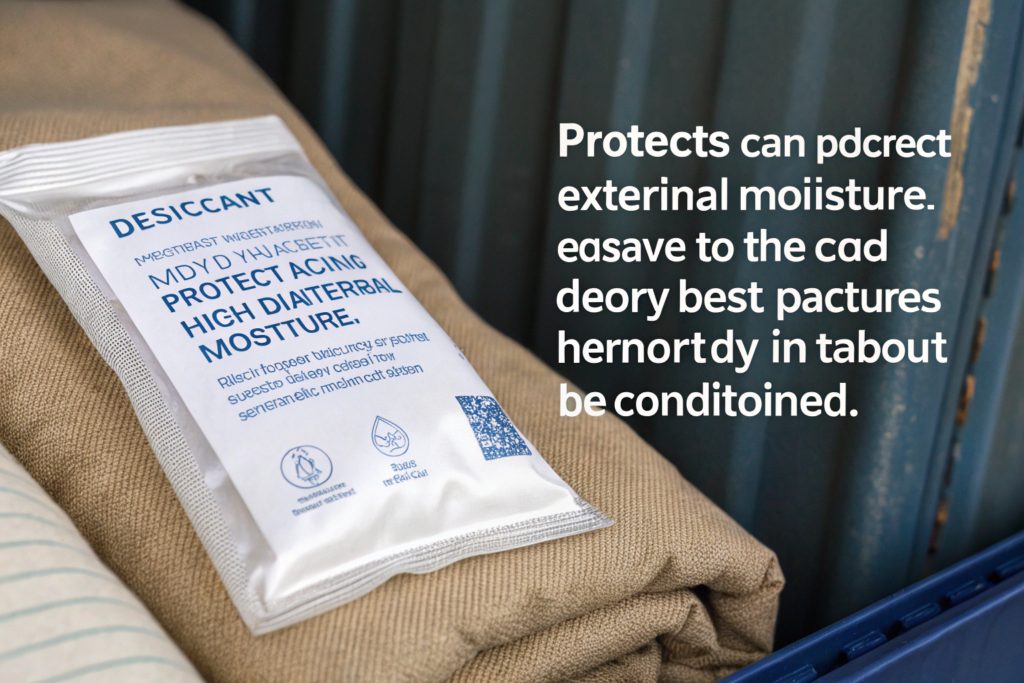
Desiccants come in several forms, but for containerized fabric shipments, the two most practical types are silica gel and calcium chloride. Silica gel is an adsorbent that traps moisture in its porous structure. It works well in sealed environments, it doesn’t leak liquid as it saturates, and it’s non-corrosive. Calcium chloride is a deliquescent that absorbs moisture until it dissolves into a brine. It has higher absorption capacity by weight than silica gel and works better in high-humidity open environments, but it can leak corrosive liquid if the bag overfills or gets damaged.
For fabric rolls sealed inside vapor-barrier bags, silica gel is the correct choice. The environment is sealed, the total moisture load is limited, and the risk of liquid leakage damaging the fabric rules out calcium chloride inside the package. The quantity calculation depends on the internal air volume of the package, the moisture content of the fabric at the time of sealing, the expected permeation through the barrier over the voyage duration, and a safety margin. A standard fabric roll of anti-static lining—about 50 meters on a tube, bagged—has an internal air volume of roughly 0.05 cubic meters. At 25°C and 60% relative humidity at the time of packing, that air contains about 1 gram of water vapor. The fabric itself, conditioned to the same environment, holds roughly 30-50 grams of adsorbed moisture depending on fiber type. The goal isn’t to dry the fabric to zero moisture—that would take kilograms of desiccant and potentially damage the fabric hand feel. The goal is to prevent condensation, which means keeping the relative humidity inside the bag below about 65% even as temperatures fluctuate.
For effective mold prevention strategies specifically for organic fiber fabrics, you might want to read about how to properly condition cotton and viscose textiles before packaging on a textile conservation forum. For container-scale desiccant, we place 1-kilogram silica gel bags in the container itself—typically 8 to 12 units for a 40-foot container, hung from the lashing rings near the ceiling and placed at floor level between the cargo and the container walls—to absorb ambient moisture in the container air. This two-level desiccant strategy is the industry best practice.
How Do Humidity Indicator Cards Work and Where Should They Be Placed?
Humidity indicator cards are the cheap insurance policy that tells you whether your moisture barrier system is working. The cards are printed with cobalt-free chemical spots that change color at specific relative humidity thresholds—typically 10%, 20%, 30%, 40%, 50%, and 60%. A blue spot indicates the humidity is below that threshold. A pink spot indicates the humidity has exceeded it. The cards cost a few cents each and provide an irreversible visual record of the maximum humidity exposure inside the package.
The placement of humidity indicator cards serves two functions. Inside the vapor-barrier bag, one card should be placed visibly against the inside of the bag, readable through the transparent film without opening the seal. This gives the receiving warehouse an immediate visual check: if the card shows pink at the 60% threshold, the barrier was breached or the desiccant was exhausted, and that roll should be inspected for moisture damage before it goes into inventory. Inside the container, two or three indicator cards should be placed in visible locations—one near the doors, one mid-container—to give a read on the container’s ambient humidity history during transit. If the container cards show high humidity but the individual roll cards are still blue, the barrier packaging did its job. If both are pink, there was a systemic moisture breach that affects the entire shipment. This data feeds back into packaging process improvement and, in the case of a claim, provides evidence about where and when the moisture exposure occurred. At Shanghai Fumao, every export roll gets a humidity indicator card inside the barrier bag, and every container gets three ambient cards. The cards are dated and photographed during packing, and the receiving client photographs them during unpacking. This documentation is part of our quality control record and our mold-free delivery guarantee.
How Should Fabric Rolls Be Arranged Inside the Container to Minimize Condensation Risk?
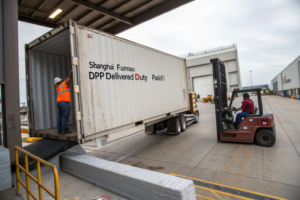
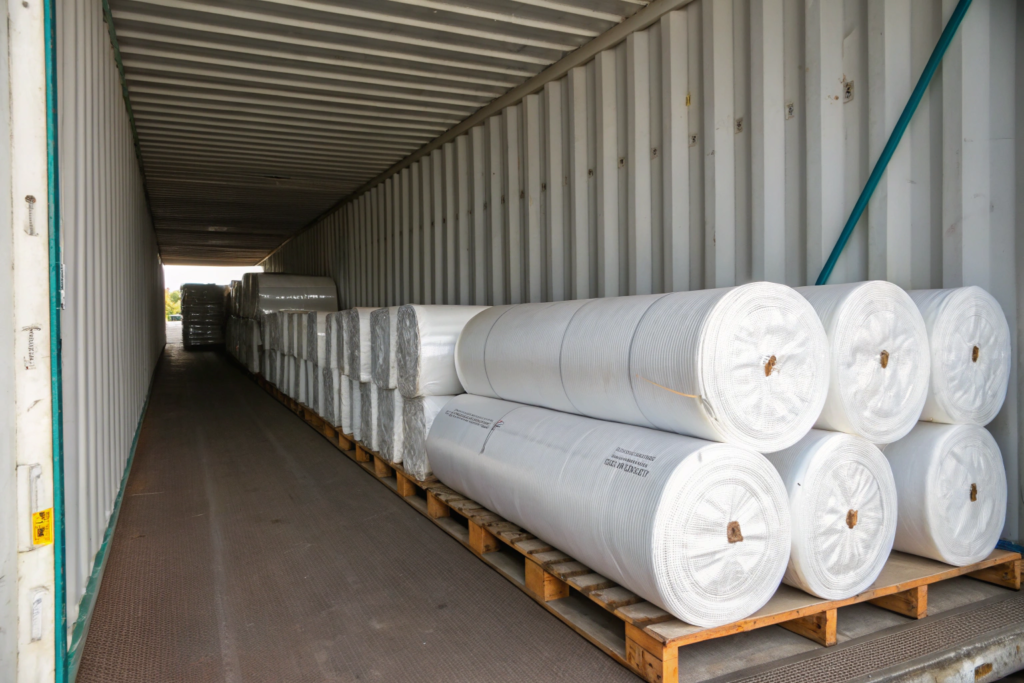
Container loading isn’t just about maximizing space utilization. It’s about managing airflow and condensation drip paths. The "container rain" phenomenon occurs when warm, humid air inside the container rises to the cold metal ceiling, condenses into water droplets, and rains down onto the cargo. The ceiling and upper walls are the coldest surfaces in the container, especially at night when the external temperature drops. Any cargo placed directly against the ceiling or the upper walls will collect that condensation.
The loading rules for fabric are straightforward. First, never stack rolls directly against the container ceiling. Leave a minimum of 15 to 20 centimeters of air space between the top layer of rolls and the container roof. This gap allows air circulation and prevents condensation on the ceiling from wicking directly into the top-layer fabric. Second, cover the top layer of cargo with a waterproof container liner or a kraft paper blanket that drapes over the sides. The liner catches any condensation dripping from the ceiling and channels it down the container walls to the floor, away from the fabric. The liner should be water-resistant, not just absorbent—kraft paper alone will soak through and transfer moisture to the rolls beneath. A polyethylene-coated kraft paper or a dedicated container liner fabric works better. Third, load rolls on pallets or dunnage, not directly on the container floor. The container floor is often wet from previous cargo, condensation runoff, or cleaning, and the moisture wicks up through cardboard and into fabric.
Container rain is predictable physics. The cold ceiling condenses humid air into water. Your packaging strategy either catches that water or lets it drip onto your fabric.
The airflow design matters too. Leave narrow ventilation channels—about 5 to 10 centimeters—between stacks of rolls and the container side walls. This allows the limited air circulation inside a sealed container to move moisture toward the desiccant bags and away from the fabric. Pack rolls tightly enough that they don’t shift during transit—shifting causes abrasion damage—but avoid a solid wall of cargo from floor to ceiling, wall to wall. The ideal loading pattern leaves a perimeter air gap around the cargo block. At Shanghai Fumao, our packing team follows a standardized container loading diagram that specifies the roll orientation, the stacking height, the air gap dimensions, and the placement of the desiccant bags and humidity indicators. This diagram is verified by the packing supervisor before the container doors close, and a photo record is kept for every shipment.
Why Does a "Cold-Wall Effect" Require Extra Protection for Rolls Near Container Surfaces?
The container walls and ceiling are essentially uninsulated metal panels exposed to the external environment. When a container sails from a warm tropical port into cooler ocean waters or through a cool night, the metal surfaces cool down much faster than the air and cargo inside. The air near the walls cools, and because cool air holds less moisture than warm air, the relative humidity near the wall surfaces spikes to 100%. Water condenses on the cold metal. This is the cold-wall effect, and the rolls closest to the walls and ceiling are in the danger zone.
Rolls placed directly against the container walls absorb the condensation through their packaging. Even vapor-barrier bags, if pressed directly against a wet metal wall, can develop condensation on the bag exterior that eventually finds a path to the fabric through seams, folds, or minor abrasion damage. The protection is physical separation. A minimum 10-centimeter gap between the cargo and the container walls creates an air buffer. The condensation still forms on the wall, but it runs down the wall to the floor rather than transferring to the cargo. For the ceiling, the protective liner acts as a false ceiling, catching the condensation and channeling it to the walls. The container floor presents the same problem in reverse—moisture evaporates from the floor when the container heats up during the day, and the vapor rises into the cargo. Pallets or plastic dunnage create the air gap that breaks the moisture path from floor to fabric. This gap strategy is standard practice in containerized shipping of moisture-sensitive goods, and it’s remarkably effective when executed consistently.
How Can Container Liners and Kraft Paper Blankets Work Together to Absorb Sudden Moisture?
Container liners and kraft paper blankets serve different but complementary roles in the moisture management system. The container liner is the waterproof shield. A polyethylene-coated or fully synthetic liner, draped over the top of the cargo and extending down the sides, acts as a physical barrier that condensation cannot penetrate. The water droplets from the ceiling hit the liner and run down the impermeable surface to the container floor, where they drain through the floor gaps or evaporate without reaching the fabric. The liner is a passive, mechanical barrier.
The kraft paper blanket is the backup absorption layer. Kraft paper can absorb roughly 1.5 to 2 times its weight in water. Placed on top of the cargo beneath the waterproof liner, or in strategic locations where condensation is most likely—along the container walls, near the doors—the kraft paper absorbs any moisture that bypasses the primary barrier. The kraft paper doesn’t prevent condensation, but it captures it before it reaches the fabric. The combination of waterproof liner plus absorbent kraft paper provides defense in depth: the liner stops the bulk of the condensation, and the kraft paper catches the small amount that gets through. When the container is unloaded, the kraft paper is inspected. If it’s damp, the moisture breach was real, and the fabric below should be inspected with extra care. If it’s dry, the liner did its job perfectly. This two-layer approach is inexpensive—liner and kraft paper together add maybe $40 to $60 to the packing cost of a 40-foot container—and provides a visible, inspectable record of condensation exposure. For more detailed material specifications on container liners and protective blankets, you can find useful discussions on packaging industry forums where logistics professionals compare different liner materials for various climate routes and cargo types.
What Pre-Packing Fabric Conditioning Steps Are Essential for Long Sea Voyages?
The packaging can only protect against external moisture. It cannot protect against moisture that you seal inside the bag with the fabric. If the fabric is packed with a high internal moisture content—because it was finished on a humid day, or it wasn’t adequately dried after the final steaming, or it was stored in an unconditioned warehouse before packing—the desiccant will be overwhelmed before the container even leaves the port. Pre-packing conditioning is about starting the voyage with the fabric in a state that the packaging system can maintain.
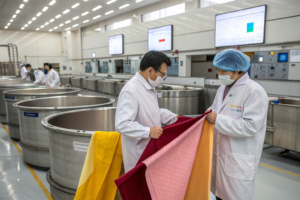
The critical parameter is the moisture regain of the fabric, which is the percentage of moisture the fabric holds relative to its dry weight. Each fiber type has a standard commercial regain: cotton is 8.5%, viscose is 11-13%, polyester is 0.4%, nylon is 4.5%. The fabric should be at or slightly below its standard regain at the time of packing. Over-conditioned fabric—fabric that has absorbed excess moisture from humid air—will release that moisture inside the sealed bag, spiking the internal humidity and potentially condensing. The conditioning step is straightforward: the fabric should be stored in a climate-controlled environment at 20-25°C and 45-55% relative humidity for at least 24 hours before packing. This allows the fabric to equilibrate to a safe moisture content. The packing area itself should maintain the same conditions so the fabric doesn’t re-absorb moisture during the packing process.
You can have the best vapor-barrier bags and the most expensive desiccants in the world, but if you seal wet fabric inside, you’ve built a mold incubator, not a mold barrier.
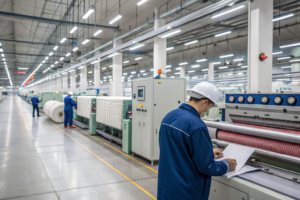
For fabrics that have undergone wet finishing processes—dyeing, washing, softening—the drying step is the critical control point. The fabric exiting the dryer or the stenter frame should be tested with a moisture meter to verify it’s at the target moisture content before it’s rolled and packed. We use a contact moisture meter on the fabric surface at multiple points across the width and length of each batch. If the reading exceeds the target, the batch goes back for additional drying or conditioning. This adds time to the packing process but eliminates the number one cause of transit mold: packing fabric that was wet to begin with.
How Do Moisture Meters Help Verify Fabric Is "Dry Enough" Before Sealing?
A moisture meter gives you an objective number instead of a subjective "feels dry" assessment. Hand feel is notoriously unreliable for moisture content—fabric can feel dry to the touch while still holding 15-20% moisture, especially in humid conditions where the ambient air is saturated. The moisture meter measures the electrical conductivity or capacitance of the fabric, which varies predictably with moisture content, and converts it to a moisture percentage.
For export fabric packing, we use a pin-type or contact moisture meter calibrated for the specific fiber type. The meter is checked against a reference standard at the start of each packing shift. The operator tests each fabric batch at multiple points—typically at least five points across the width and at intervals along the length. If any reading exceeds the target for that fiber type, the batch is flagged for re-conditioning. The acceptable maximum at packing time varies by fiber and destination climate, but as a general rule for sea transit, we target a moisture content at or slightly below the fiber’s standard regain. For polyester anti-static lining, that means below about 0.5%. For viscose linings, below about 11%. For cotton shirting, below about 8%. The moisture meter readings are recorded on the packing checklist for each batch, creating a quality record that can be referenced if a mold issue arises at destination. This data often helps pinpoint whether the mold originated in transit or from a pre-existing condition. For technical comparisons of moisture meter types and their accuracy on different textile fibers, textile testing forums and quality control equipment supplier resources provide detailed guidance on meter selection and calibration protocols.
What Role Does the Cooling-Off Period After Stenter Drying Play in Mold Prevention?
The stenter frame dries and heat-sets fabric at temperatures ranging from 140°C to 200°C depending on the fiber and finish. The fabric exits the stenter at a very low moisture content—effectively zero at the surface—and at a high temperature. But here’s the trap: hot fabric, when rolled and packed immediately, cools down inside the roll over several hours. As the air trapped between the fabric layers cools, its relative humidity increases. If the fabric wasn’t completely dry at the core, or if the roll was packed in a humid environment, condensation can form between the layers inside the roll.
The cooling-off period solves this problem. After exiting the stenter, the fabric should be allowed to cool and condition in open air in a controlled environment for a minimum of 6 to 12 hours before rolling and packing. During this period, the fabric temperature equalizes with the ambient air, the moisture content equilibrates throughout the fabric thickness, and any residual heat that would drive condensation is dissipated. The fabric is then rolled at ambient temperature, and the air trapped inside the roll is the same temperature and humidity as the conditioned packing area air. When the roll is later sealed in the barrier bag with desiccant, there are no internal temperature gradients to drive condensation. This cooling-off period is the step that impatient packing teams skip, and it’s the step that causes "mystery mold" on fabric that felt dry when it was rolled. The moisture didn’t come from the container. It came from the heat of the fabric itself, condensing residual moisture as it cooled inside a sealed roll. For more technical discussion on post-stenter conditioning protocols and their impact on fabric storage stability, textile manufacturing process forums have detailed threads where production engineers share their standard operating procedures and trouble-shooting experiences.
Conclusion
Preventing mold during sea transit is not a single intervention—it’s a system of layered barriers against moisture, starting from the moment the fabric exits the finishing line and ending when the container doors open at the destination warehouse. The pre-packing conditioning ensures the fabric starts the voyage at a safe moisture content. The vapor-barrier polyethylene bag, sealed with silica gel desiccant and a humidity indicator card inside, creates a micro-environment that isolates the fabric from the container’s ambient humidity fluctuations. The container loading design—air gaps around the cargo block, a waterproof ceiling liner, absorbent kraft paper backups, and container-scale desiccant bags—manages the condensation that inevitably forms on the container’s cold metal surfaces. Each layer alone is insufficient. Together, they form a mold prevention system that works reliably across tropical and temperate routes, summer and winter, short transits and extended port delays.
The system is not expensive relative to the value it protects. The incremental cost of vapor-barrier bags, silica gel desiccant, humidity indicator cards, container liners, and kraft paper blankets for a 40-foot container of fabric is roughly $150 to $250. The cost of a single mold claim—the fabric write-off, the shipping cost, the client relationship damage, the replacement production—starts at several thousand dollars and can reach the full container value of $30,000 to $80,000. The economics are not subtle. The packaging investment returns multiples in risk reduction. I learned this the hard way, in 2019, with an $8,000 container of viscose lining that arrived looking like it had been stored in a rainforest. That experience redesigned our entire packaging process, and we haven’t had a mold claim since.
At Shanghai Fumao, mold-free delivery is a standard specification, not a premium option. Our export packaging protocol includes all the elements described here: pre-packing moisture content verification with calibrated meters, cooling-off period after finishing, vapor-barrier bagging with silica gel desiccant and humidity indicator cards, standardized container loading diagrams with air gap specifications, polyethylene-coated kraft paper ceiling liners, and container-scale desiccant placement. Every shipment is documented with packing photos, moisture readings, and indicator card images. This system is part of our 98% client inspection pass rate, and it’s why our clients in humid climates like Singapore, Miami, and Hamburg receive their fabric in the same condition it left our factory.
If you’re sourcing fabric for sea transit to a humid destination, or if you’ve experienced mold issues with previous suppliers and want to understand how a professional packaging system eliminates the risk, reach out to our Business Director, Elaine, at elaine@fumaoclothing.com. She can walk you through our packaging specifications, provide sample documentation from recent shipments, and coordinate a shipment that arrives as pristine as the day it was packed.