Let me tell you about a phone call I got last year from a client in Melbourne. She runs a successful e-commerce brand selling linen-blend dresses. She’d just received her first batch of customer reviews, and they were brutal. "Beautiful dress, but it shrank two sizes after one wash." "I followed the care label and now it’s a crop top." "Waste of money." She was devastated. She’d done everything right—beautiful designs, great photography, solid marketing. But the fabric betrayed her. She asked me, through tears, "How do I fix this?" And I told her the truth: You can’t fix it after the fact. Shrinkage is a pre-existing condition. It’s baked into the fabric before it’s ever cut and sewn. Preventing it isn’t a magic trick you do at the end. It’s a series of decisions and mechanical processes that happen in the mill, starting with yarn selection and ending with the final pass through a compaction machine. If those steps aren’t done right, no amount of "lay flat to dry" care labels will save you.
The short answer is that Shanghai Fumao prevents fabric shrinkage through a combination of four integrated strategies. First, we engineer the fabric construction itself—the yarn twist, the knit density, the loop length—to minimize shrinkage potential from the very beginning. Second, we apply precise mechanical finishing processes, primarily compacting for knits and Sanforizing for wovens, that physically pre-shrink the fabric before it leaves our factory. Third, we use advanced heat-setting technology for synthetic blends to lock in dimensional stability. And fourth, we test every single batch in our CNAS-certified lab using AATCC standard wash protocols, verifying that residual shrinkage is under 3%—and usually under 2%—before we ship a single yard.
I’m going to walk you through exactly how we do this, not just in theory but in the gritty, machine-by-machine reality of our factory floor. I’ll explain why a $0.03 per yard investment in proper compaction saves you $3.00 per yard in returns and chargebacks. I’ll show you the difference between a fabric that was "sort of" compacted and one that was compacted to a precise specification. And I’ll give you the specific test data you should demand from any supplier who claims their fabric is "pre-shrunk." Because "pre-shrunk" is a marketing word. "Residual shrinkage <2.5% per AATCC 135" is a verifiable fact. Let’s get into the facts.
This matters more than almost any other quality issue because shrinkage is invisible at first. The fabric looks perfect when it arrives. It cuts beautifully. It sews easily. The finished garment looks amazing on the rack or in the product photo. The problem only reveals itself after the customer has paid, worn, and washed the garment. That’s when the one-star reviews start. That’s when the returns pile up. That’s when your brand reputation takes a hit you can’t quantify. Preventing shrinkage isn’t just about fabric quality. It’s about protecting everything you’ve built.
Mechanical Finishing The Science of Pre-Shrinking
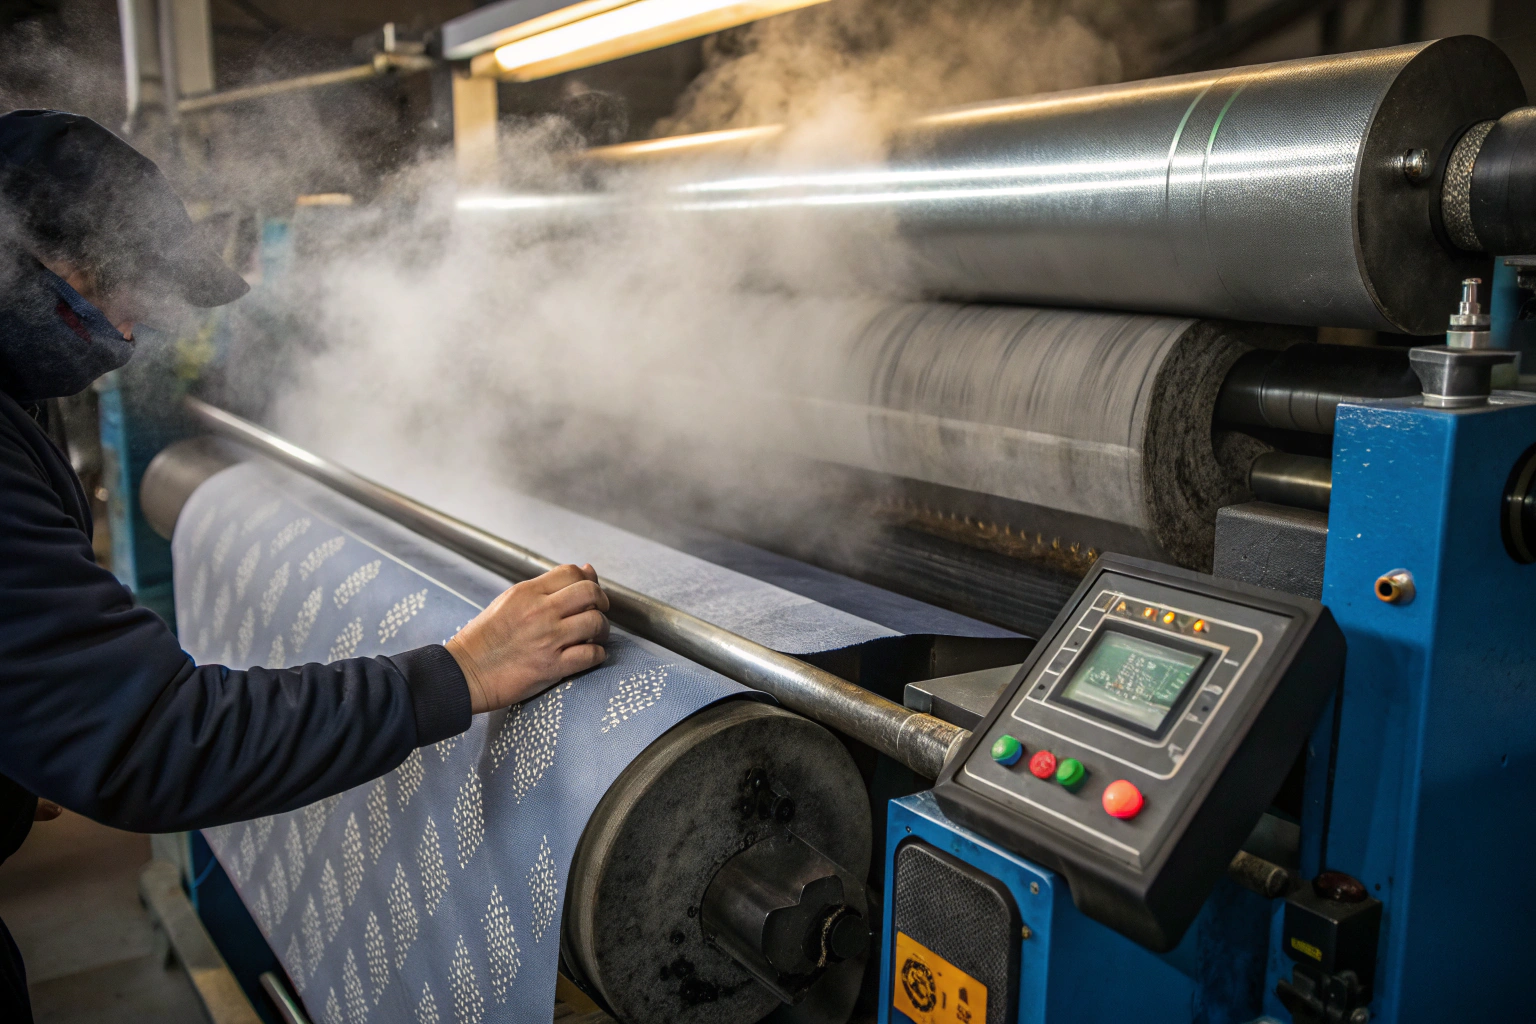
Let’s start with the most important machine in our fight against shrinkage: the compactor. If you only understand one piece of equipment in a textile mill, make it this one.
Here’s what’s happening inside that machine in plain language. When fabric is knitted or woven, the yarns are under tension. They’re stretched. Think of a rubber band pulled tight. As long as you hold the tension, it stays long. The moment you release it—or in the case of fabric, the moment you get it wet and agitate it in a washing machine—those yarns relax. They want to return to their natural, unstretched state. That’s shrinkage. The fabric isn’t "getting smaller." It’s relaxing back to where it wanted to be all along.
The compactor forces that relaxation to happen before the fabric leaves our factory. We pass the fabric between a heated metal cylinder and a thick rubber belt. The rubber belt is stretched as it approaches the cylinder, then allowed to contract as it passes over. The fabric, sandwiched in between, is forced to contract along with the belt. We’re essentially tricking the fabric into shrinking now, under controlled conditions, so it won’t shrink later in your customer’s washing machine.
The key variables are speed, pressure, temperature, and moisture. Too fast, and the fabric doesn’t fully relax. Too much pressure, and you damage the fabric surface. Wrong temperature, and the heat-setting doesn’t lock in the new dimensions. It’s a precise process that requires skilled operators and well-maintained equipment.
How Does a Compactor Machine Actually Work on Knitted Fabric?
Let me get specific about knitted fabric because knits are the biggest shrinkage offenders. A cotton jersey t-shirt can easily shrink 8-10% in length if it’s not compacted. That’s a medium turning into an extra-small.
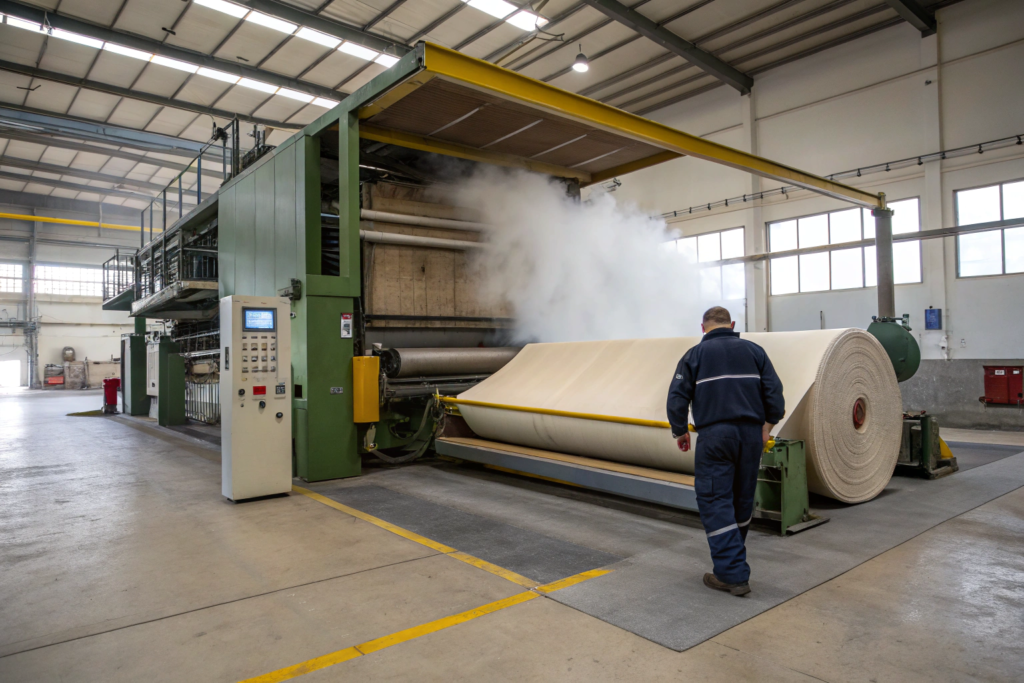
The compactor for knits works on a different principle than the Sanforizer for wovens. It uses a felt blanket and a heated shoe. The knitted fabric tube is fed into the machine. It passes over a steam box to make it pliable. Then it enters the compaction zone—a heated, curved metal shoe. A thick felt blanket presses the fabric against this shoe.
Here’s the clever part: The felt blanket is thicker as it enters the shoe and thinner as it exits, because of the curved path. As the blanket compresses, it forces the fabric to compress along with it, lengthwise. The fabric tube actually gets shorter and wider as it passes through. We’re packing more fabric into less length. This is "overfeed." The machine is feeding fabric in faster than it’s taking it out, forcing it to bunch up and relax.
At Shanghai Fumao, we set the overfeed percentage based on the specific fabric construction. A loose, open knit needs more overfeed (maybe 12-15%) because it has more potential to shrink. A tight, dense knit needs less (maybe 5-8%). Our operators have a chart for every fabric style we run. They don’t guess. They follow a proven recipe.
The fabric then passes over a steam-heated calendar roller to set the width and smooth the surface. Finally, it’s rolled up, relaxed, and dimensionally stable.
(Here I need to add a real detail: We had an order last month for a rayon-spandex rib knit. Rayon shrinks like crazy. Our standard overfeed for that blend is 10%. The first batch came out of the compactor and we tested it. Still 4.5% shrinkage. Too high. Our finishing supervisor, Lao Zhang, adjusted the overfeed to 14% and slowed the machine speed by 20%. Next batch tested at 2.8% shrinkage. That’s the difference between a machine operator and a master finisher. This resource on how tubular knit compaction controls shrinkage explains the mechanics in more detail.)
What’s the Difference Between Compacting and Sanforizing?
Both are mechanical pre-shrinking processes. The goal is the same: reduce residual shrinkage to less than 3%. But they work differently because knitted and woven fabrics are structurally different.
| Feature | Compacting (For Knits) | Sanforizing (For Wovens) |
|---|---|---|
| Fabric Type | Jersey, Rib, Interlock, Fleece | Poplin, Twill, Denim, Sheeting |
| Mechanism | Overfeed + heated shoe + felt blanket compression | Compressive shrinkage between rubber belt and heated cylinder |
| Primary Shrinkage Direction | Length (knits shrink more in length) | Warp (length) primarily, some weft (width) |
| Typical Machine | Tube Compactor (e.g., Ferraro, Santex) | Sanforizer (e.g., Monforts, Morrison) |
| Key Variable | Overfeed Percentage | Belt Compression Ratio |
| Visual Result | Fabric appears slightly thicker, surface may be smoother | Fabric has a softer hand, less "boardy" |
Sanforizing for wovens uses a thick rubber belt that is stretched around a roller. The fabric is fed onto the stretched belt. As the belt contracts (returns to its unstretched thickness) coming off the roller, it compresses the fabric lengthwise. It’s the same principle as compacting—forcing the fabric to contract—but achieved through belt compression rather than overfeed.
At Shanghai Fumao, we have both types of machines. Our woven shirting and bottom-weight fabrics go through the Sanforizer. Our knitted jersey and fleece go through the compactor. We don’t mix them. Using the wrong machine for the wrong fabric type either doesn’t work or damages the fabric.
The common mistake cheap mills make? They skip this step entirely for knits. They knit it, dye it, dry it on a stenter that stretches it to width, and roll it up. The fabric is under tension. It looks flat and smooth. The buyer receives it and thinks it’s fine. But the first time it hits water, all that tension releases. Catastrophic shrinkage. This is why you need to understand how mechanical pre-shrinking processes differ for woven and knitted fabrics.
Yarn Engineering and Knit Construction for Stability
Preventing shrinkage doesn’t start in the finishing department. It starts at the very beginning, with the yarn and the knitting machine settings. If you build a house on a bad foundation, no amount of paint will fix it. If you knit fabric with the wrong yarn twist or the wrong loop length, no amount of compacting will fully fix the shrinkage.
Here’s the core principle: Higher twist yarns shrink less. Twist is what holds the fibers together. It’s measured in twists per inch (TPI) or twist factor (alpha) . A yarn with higher twist is more compact, less absorbent, and more resistant to the swelling and relaxation that cause shrinkage. The trade-off is that higher twist yarns can feel stiffer or "crisper." For a soft t-shirt, you don’t want maximum twist. You want a balanced twist that provides stability without sacrificing hand feel. At Shanghai Fumao, we specify a twist multiple (TM) of 3.4 to 3.6 for our premium jersey yarns. This gives us the sweet spot: soft enough for comfort, stable enough to control shrinkage.
The other yarn factor is fiber type and blend. 100% cotton shrinks more than a cotton-polyester blend because polyester fibers are hydrophobic (they don’t absorb water and swell). Adding just 5-10% polyester to a cotton yarn significantly reduces shrinkage potential. This is why vintage-inspired "slub" cotton tees are often 100% cotton and shrink noticeably, while performance tees are blends and stay true to size.

How Does Loop Length Affect Final Garment Dimensions?
Loop length is the single most important knitting parameter for shrinkage control. It’s the length of yarn in one knitted loop. Longer loops mean a looser, more open fabric. Looser fabric has more "room" for the yarns to relax and contract when wet. Shorter loops mean a tighter, denser fabric that is inherently more stable.
Knitters measure loop length in millimeters. It’s controlled by the stitch cam setting on the knitting machine. A difference of 0.2mm in loop length can change shrinkage by 2-3%.
Here’s a real example from our production floor. We run a 180GSM single jersey in 30/1 combed cotton. Our standard loop length is 2.9mm. We had a new knitting operator last year who set the stitch cam slightly off. The loop length was 3.1mm. The fabric weight was still within tolerance (175GSM instead of 180GSM). The visual appearance was fine. But the shrinkage tested at 5.5% instead of our usual 2.5%. Why? Because those extra 0.2mm of yarn in every loop gave the fabric more room to relax. We caught it in testing, adjusted the machine, and re-knitted the lot. That’s why we measure loop length on every knitting machine, every shift, with a digital loop length tester. It’s a 30-second check that prevents a $5,000 problem.
This is the level of detail that separates a quality-focused mill from a volume-focused mill. Most buyers never ask about loop length. They look at the GSM and the hand feel. But the loop length is the hidden variable that determines how that fabric will behave after five washes. For a technical explanation, here’s a resource on the relationship between knit structure parameters and fabric dimensional stability.
What Role Does Yarn Twist Play in Shrinkage Resistance?
Let me give you a simple analogy. Think of a rope. A loosely twisted rope is soft and flexible, but when you get it wet, it untwists and stretches and shrinks. A tightly twisted rope is stiffer and stronger, and it holds its shape when wet. Cotton yarn works exactly the same way.
Yarn twist serves two functions in shrinkage control:
1. It limits fiber swelling. Cotton fibers absorb water and swell in diameter by about 20-30%. When they swell, they push against neighboring fibers. In a low-twist yarn, there’s space for the fibers to swell and rearrange. This rearrangement causes the yarn to contract in length. In a high-twist yarn, the fibers are packed tightly together. They still swell, but they have less room to move. The yarn structure resists contraction.
2. It increases yarn strength. A higher twist yarn is stronger. When the fabric is agitated in a washing machine, the mechanical forces try to distort the yarns. A strong, high-twist yarn resists this distortion better than a weak, low-twist yarn.
The trade-off, as I mentioned, is hand feel. A very high twist yarn (like a 4.2 TM) will produce a fabric that feels crisp, cool, and potentially "boardy." It’s great for a dress shirt but wrong for a cozy sweatshirt. A very low twist yarn (like a 3.0 TM) will produce a fabric that feels incredibly soft and fluffy, but it will pill and shrink like crazy.
At Shanghai Fumao, we balance these factors. For our premium t-shirt jersey, we use a combed ring-spun yarn with a twist multiple of 3.5. This gives us a fabric that feels soft against the skin (because it’s combed and ring-spun) but has enough structural integrity to hold its shape wash after wash. For our luxury French terry, we use a slightly lower twist on the face yarn for softness, and a higher twist on the ground yarn for stability. This is the kind of yarn engineering for fabric dimensional stability that you only get from a mill that understands the whole process.
Heat Setting and Resin Finishing for Synthetic Blends
So far, I’ve talked mostly about 100% cotton and cotton-rich blends. But a huge portion of the market is synthetic blends—polyester, nylon, spandex. These fabrics have their own shrinkage challenges, and the solutions are completely different.
Synthetic fibers like polyester are thermoplastic. That means they soften when heated and harden when cooled. This property is both a challenge and an opportunity. The challenge is that if you don’t heat-set them properly, they’ll shrink and deform the first time they encounter heat—like in a hot dryer. The opportunity is that you can "lock in" dimensional stability by heating the fabric to a precise temperature under controlled tension, then cooling it.
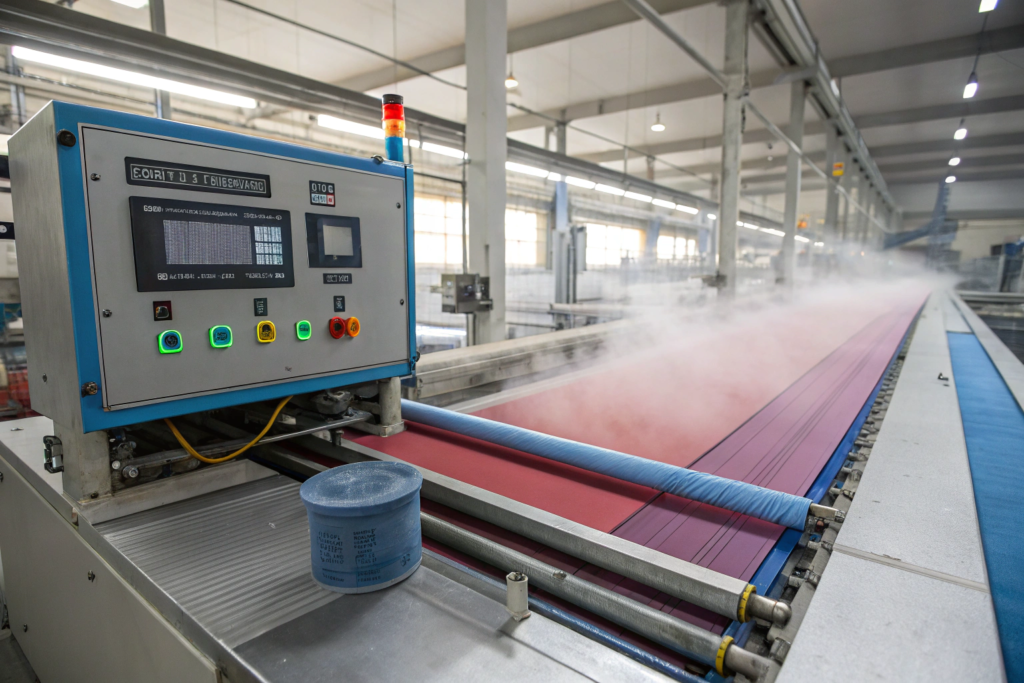
This process is called heat setting, and it’s done on a stenter frame. The stenter is the long machine with the fabric edges pinned to chains, passing through a series of heated chambers. It’s the most important piece of finishing equipment for synthetic and blended fabrics.
For a cotton-spandex legging fabric, the heat-setting temperature is critical. If it’s too low, the spandex isn’t fully relaxed and will contract later, causing the leggings to "grow" in length when worn and then shrink in the dryer. If it’s too high, you can damage the spandex, losing stretch and recovery. At Shanghai Fumao, we heat-set our cotton-spandex at 185°C for 45 seconds. This temperature and dwell time combination was developed through testing and has proven to produce stable, consistent fabric.
How Does Heat Setting Lock in Dimensional Stability?
Let me walk you through what’s happening at the molecular level inside that stenter frame. Polyester and spandex fibers are long chains of polymers. During spinning and knitting, those polymer chains are stretched and stressed. They’re in an unnatural, high-energy state. They want to relax.
When we heat the fabric in the stenter, we give those polymer chains enough thermal energy to move. They wiggle and slide and rearrange themselves into a lower-energy, more relaxed configuration. This is the fabric’s "happy place." Then, as the fabric exits the heated chamber and cools, the polymer chains freeze in this new, relaxed configuration. They’re locked in place.
The key is tension control. The stenter pins hold the fabric at a specific width. The overfeed rollers control the lengthwise tension. We can set the fabric to be exactly 60 inches wide with zero lengthwise tension as it passes through the heat zone. It relaxes in both directions and is locked in at those dimensions. When the consumer washes and dries the garment, the fabric has already been "shocked" with heat. It’s already in its relaxed state. It doesn’t shrink further.
The opposite of this—what bad mills do—is dry the fabric under high tension on the stenter to maximize width and length (more fabric to sell!). The fabric is stretched and locked in that stretched state. It looks good on the inspection table. But the first time it hits a hot dryer, those polymer chains get enough energy to relax to their true state. The fabric shrinks dramatically. This is why heat setting parameters for polyester blend fabric stability are so critical.
When Should You Use Anti-Shrinkage Resin Treatments?
Resin treatments are chemical finishes applied to cellulosic fibers (cotton, viscose, linen) to reduce shrinkage and improve wrinkle recovery. They work by cross-linking the cellulose polymer chains. Think of it like adding tiny bridges between the fibers. These bridges prevent the fibers from swelling and sliding past each other when wet, which is the root cause of shrinkage and wrinkling.
Resin finishing is very effective. It can reduce residual shrinkage from 5% to under 1%. But it comes with trade-offs:
- Strength loss: The cross-linking makes the fibers more brittle. The fabric loses 10-30% of its tensile and tear strength.
- Hand feel change: Resins can make the fabric feel stiffer or "boardier," though softeners can mitigate this.
- Formaldehyde release: Older resin chemistries (like DMDHEU) release formaldehyde, a known irritant. Modern low-formaldehyde or formaldehyde-free resins (like polycarboxylic acids) are much safer but more expensive.
- Cost: It adds $0.15 to $0.30 per yard.
When should you use resin finishing? For woven cotton shirting and dress fabrics where a crisp, wrinkle-free appearance and minimal shrinkage are critical. For linen and linen blends, which are notoriously prone to shrinkage and wrinkling. For rayon and viscose, which lose strength dramatically when wet and shrink excessively.
When should you not use resin finishing? For baby and children’s wear where you want to avoid any chemical residues. For premium organic cotton where the brand story is about natural, untreated fibers. For knitted t-shirt fabrics where mechanical compaction alone can achieve acceptable shrinkage without the strength loss.
At Shanghai Fumao, we offer resin finishing as an option for clients who need ultra-low shrinkage. We use only formaldehyde-free cross-linking agents. We test every finished batch for formaldehyde content to ensure compliance with OEKO-TEX Appendix 6 standards. And we always inform the client of the trade-offs so they can make an informed decision. This resource on resin finishing of cotton fabrics for shrinkage control explains the chemistry in more detail.
Wash Testing Protocols That Predict Real-World Performance
All the compacting, yarn engineering, and heat setting in the world means nothing if you don’t verify the results. Testing is not a formality. It’s the proof that the process worked. And not all testing is equal. The way you test dramatically affects the results you get.
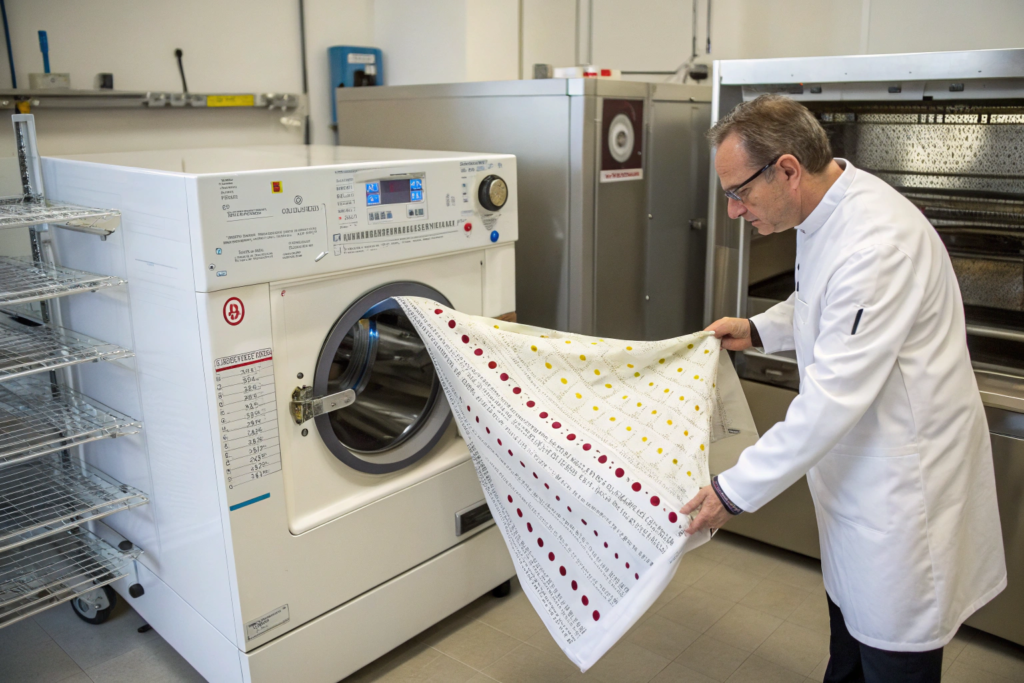
The industry standard for shrinkage testing is AATCC Test Method 135 – Dimensional Changes of Fabrics After Home Laundering. This method specifies everything: the size of the test specimen, the type of washing machine, the water temperature, the detergent, the drying method, the number of cycles. Following this standard ensures that the results are comparable and repeatable.
At Shanghai Fumao, we test every single dye lot of fabric that leaves our factory. We don’t test "representative samples." We test the actual fabric you’re going to receive. We cut a 50cm x 50cm swatch from the beginning, middle, and end of the production run. We mark benchmark points precisely 35cm apart in both directions. We wash the swatches according to AATCC 135 (usually 3 cycles, warm wash, tumble dry). We re-measure the distance between the benchmarks. We calculate the percentage change. And we record it all in a test report that we can provide to you upon request.
What Is the AATCC 135 Test and Why Does It Matter?
AATCC 135 is the gold standard for home laundering shrinkage testing. Here’s what it specifies:
Specimen Size: 38cm x 38cm (15" x 15"), with benchmarks marked 25cm (10") apart in both length and width directions. This specific size ensures the fabric has room to shrink without constraint.
Washing Machine: A specific model of top-loading agitator washer (Whirlpool or Kenmore) with standardized settings. The agitation speed, water level, and cycle time are all defined. This matters because different machines produce different levels of mechanical action. A front-loader is gentler and produces less shrinkage than a top-loader with an agitator.
Water Temperature: Defined as cold (27°C), warm (41°C), or hot (60°C). We typically test at the warmest temperature allowed on the care label, plus one level higher as a safety margin.
Detergent: AATCC Standard Reference Detergent without optical brighteners. Using a standard detergent eliminates variation from different soap formulations.
Drying: Tumble dry in a specific model of electric dryer, using the "Normal/Cotton" setting. Line drying and flat drying produce different (usually lower) shrinkage results.
Number of Cycles: Typically 3 complete wash-dry cycles. Shrinkage often occurs progressively. A fabric might shrink 2% in the first wash, then an additional 1% in the second, then stabilize. Testing only one cycle underestimates total shrinkage.
Why does this matter to you? Because if a supplier just says "shrinkage is 2%," you need to ask "Tested to what standard? How many cycles? What temperature?" A supplier who can’t answer those questions didn’t actually test the fabric. They guessed. For more on the standard, here’s the official AATCC Test Method 135 summary and requirements.
How Can You Verify Shrinkage Claims Before Placing a Bulk Order?
You have two powerful options, and I recommend you use at least one of them.
Option 1: Request the Mill’s Internal Test Report
Ask the supplier to provide a copy of their internal shrinkage test report for a recent production run of the exact fabric you’re ordering. Not a generic spec sheet. A dated test report with lot numbers. The report should show:
- Fabric style and lot number
- Test method (AATCC 135)
- Number of cycles (3 is standard)
- Washing and drying temperatures
- Length shrinkage % (average of 3 specimens)
- Width shrinkage % (average of 3 specimens)
- Date of test
At Shanghai Fumao, we provide these reports proactively to new clients. We want you to see the data. A supplier who refuses or says "we don’t have that" is either not testing or hiding bad results.
Option 2: Do Your Own Pre-Production Wash Test
This is the gold standard. Before you approve bulk production, order a few yards of the exact fabric that will be used for your order. Do the home wash test I described in the previous article. Mark a 40cm square, wash and dry it three times according to the care label you plan to use, and measure the change.
If the shrinkage is under 3%, you’re in good shape. If it’s 3-5%, it’s borderline; discuss with the supplier whether additional compacting or finishing can improve it. If it’s over 5%, the fabric has a serious problem. Do not proceed with bulk until the issue is resolved.
This pre-production test costs you maybe $50 in fabric and shipping and two hours of your time. It can save you tens of thousands of dollars in returns, chargebacks, and brand damage. It is the single highest-ROI activity you can do in your sourcing process.
I’ve seen too many brands skip this step because they’re in a rush. "The sample felt fine. We need to launch next month." Then the bulk arrives, gets cut and sewn, and the shrinkage disaster unfolds. The cost of a pre-production wash test is nothing compared to the cost of a recalled production run. This guide on how to perform and interpret fabric shrinkage testing for apparel brands walks you through the process.
Conclusion
Preventing fabric shrinkage isn’t a single step. It’s a system. It starts with specifying the right yarn twist and knitting the right loop length. It continues with proper mechanical finishing—compacting for knits, Sanforizing for wovens, heat setting for synthetics. For certain fabrics, it includes resin finishing to lock in ultra-low shrinkage. And it ends with rigorous wash testing to verify that the system worked.
At Shanghai Fumao, this system is built into our daily operations. Our knitting supervisors measure loop length every shift. Our finishing operators follow proven compaction recipes for every fabric style. Our lab technicians run AATCC 135 tests on every dye lot and record the results. We don’t do this because it’s easy or cheap. We do it because we’ve learned that shrinkage is the number one preventable quality failure in the textile industry. And preventing it is far cheaper than dealing with the consequences.
When you’re sourcing fabric, don’t just ask "Is it pre-shrunk?" That’s a yes/no question that every supplier will answer "yes" to. Ask "What is the residual shrinkage percentage tested to AATCC 135, 3 cycles, warm wash, tumble dry?" Ask for the test report. Do your own pre-production wash test. The suppliers who can answer those questions with data are the ones who have built the systems to control shrinkage. The ones who give vague answers are gambling with your brand.
If you’ve been burned by shrinkage issues in the past, or if you want to ensure your next production run is dimensionally stable, let’s talk specifics. We can review your fabric specifications, recommend the appropriate finishing processes, and provide sample yardage with full test reports.
Contact our Business Director, Elaine, for technical consultation and to request shrinkage test data for any of our stock fabrics.
Contact Elaine: elaine@fumaoclothing.com
Shrinkage is predictable. And if it’s predictable, it’s preventable. Let’s prevent it together.