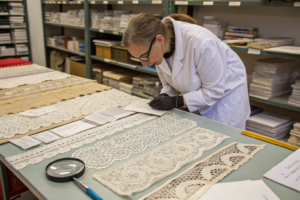
So, you've sourced the most exquisite, ethically produced lace for your collection. Now comes the moment of truth: turning these delicate, often costly panels into a flawless garment. If you’ve ever felt your heart sink at the sound of a lace snag, or seen a beautiful seam pucker and distort, you’re not alone. Lace can be a sewer’s dream and nightmare rolled into one. The problem is clear: using standard techniques on lace leads to frustration, wasted material, and a compromised final product that doesn’t do justice to your design or your investment.
The solution lies in a specialized toolkit and a shift in mindset. Success with lace isn’t about brute force; it’s about precision, support, and understanding the unique structure of the fabric. By choosing the correct needle, thread, stabilizer, and sewing method for your specific lace type, you transform a challenging material into your most stunning creation. It’s the difference between fighting the fabric and guiding it to perfection.
At Shanghai Fumao, we don’t just supply lace; we work with designers and manufacturers daily to solve these exact production headaches. I’ve spent countless hours in sample rooms with clients, from indie brands in Paris to large-scale manufacturers in Turkey, dialing in the perfect settings. Let’s break down the professional techniques that will elevate your lace sewing from stressful to seamless.
Which Sewing Machine Needle is Perfect for Lace?
Think of the needle as the conductor of your sewing orchestra—if it’s wrong, everything falls apart. A universal needle is a blunt instrument against lace’s intricate architecture. The wrong needle will skip stitches, create runs, or leave visible holes that ruin the fabric’s appearance. Your goal is to pierce the lace cleanly without damaging its threads or embellishments.
The choice hinges on two factors: the lace’s fiber content and its construction. Is it a fine, smooth polyester chiffon lace or a heavier, textured cotton guipure? Does it have delicate sequins or beading? The needle must match. The golden rule is to use the smallest needle size that can reliably carry your thread without breaking. For most laces, you’ll be stepping down significantly from the needles used for wovens like denim or canvas.
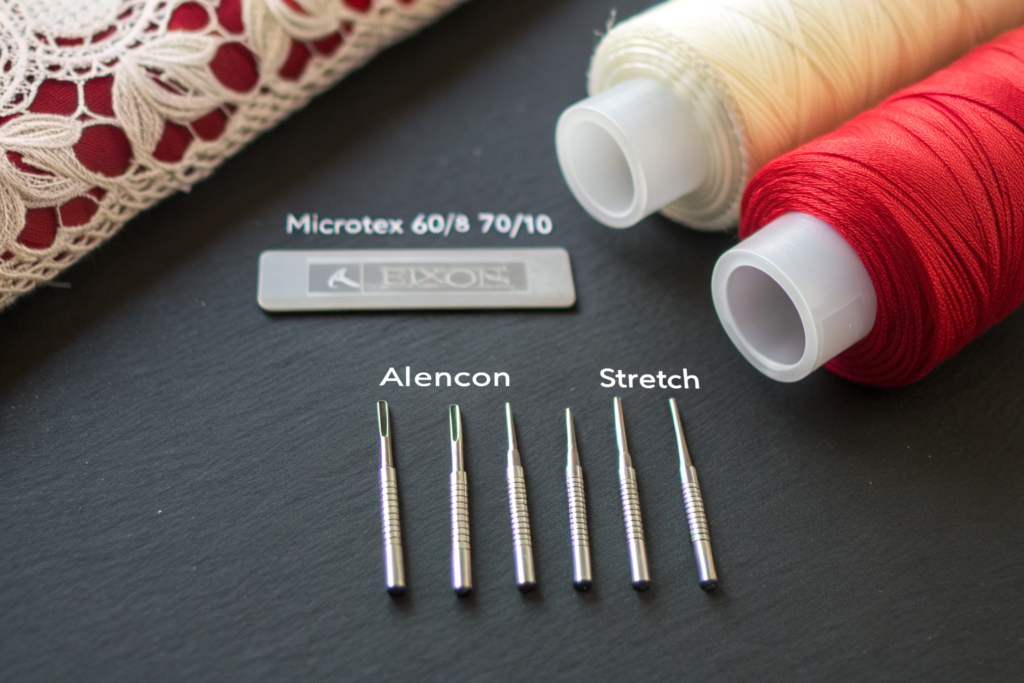
Microtex vs. Universal: Which Needle Causes Less Damage?
For the vast majority of woven and non-stretch laces (like chantilly, re-embroidered lace, or eyelet lace), the Sharp/Microtex needle is your undisputed champion. Its acute, finely tapered point is designed to pierce threads cleanly rather than push them aside or shred them. A universal needle has a slightly rounded point that can deflect off fine threads or punch an unnecessarily large hole. In a production run for a Spanish bridal house last year, switching from a universal 80/12 to a Microtex 70/10 for their silk Venise lace overlays reduced snagging by over 70% and virtually eliminated visible puncture marks on the finished seams. The difference was immediately apparent in the sample quality.
Choosing the right tool is a foundational skill. For designers looking to deepen their technical knowledge, resources like The Thread Theory’s guide to sewing machine needles offer an excellent breakdown of point types and applications. Furthermore, understanding how needle size impacts fabric integrity is crucial for preventing damage before it happens, especially when working with precious materials.
When Should You Use a Ballpoint or Stretch Needle?
This is the exception to the sharp-point rule. If you are working with knitted lace or lace containing spandex/elastane (common in lingerie and athleisure), you must use a Ballpoint or Stretch needle. These needles have a rounded tip designed to slip between the knitted loops or elastic fibers instead of piercing and potentially breaking them. Using a sharp Microtex needle on a stretch lace can sever the elastic threads, causing the seam to lose all recovery and creating a “dead” area that won’t stretch with the rest of the garment. Always test on a scrap first—if the lace recovers its shape after stitching without popping stitches, you’ve got the right needle.
What are the Essential Techniques for Sewing Seams in Lace?
Sewing lace is less about joining two pieces and more about creating an invisible union. The aim is for the seam to disappear, allowing the lace pattern to flow uninterrupted. Standard straight seams often look bulky and obvious. Your technique arsenal needs to shift towards methods that either minimize bulk, mimic the lace’s own appearance, or are designed to be covered.
The core principle is support and stabilization. Lace is often unstable and can stretch or distort under the presser foot. Your first step, before any permanent stitching, should always be to temporarily stabilize the seam line. Furthermore, finishing techniques are not an afterthought—they are integral to the seam’s construction. A raw edge left on lace can unravel spectacularly or feel scratchy against the skin.
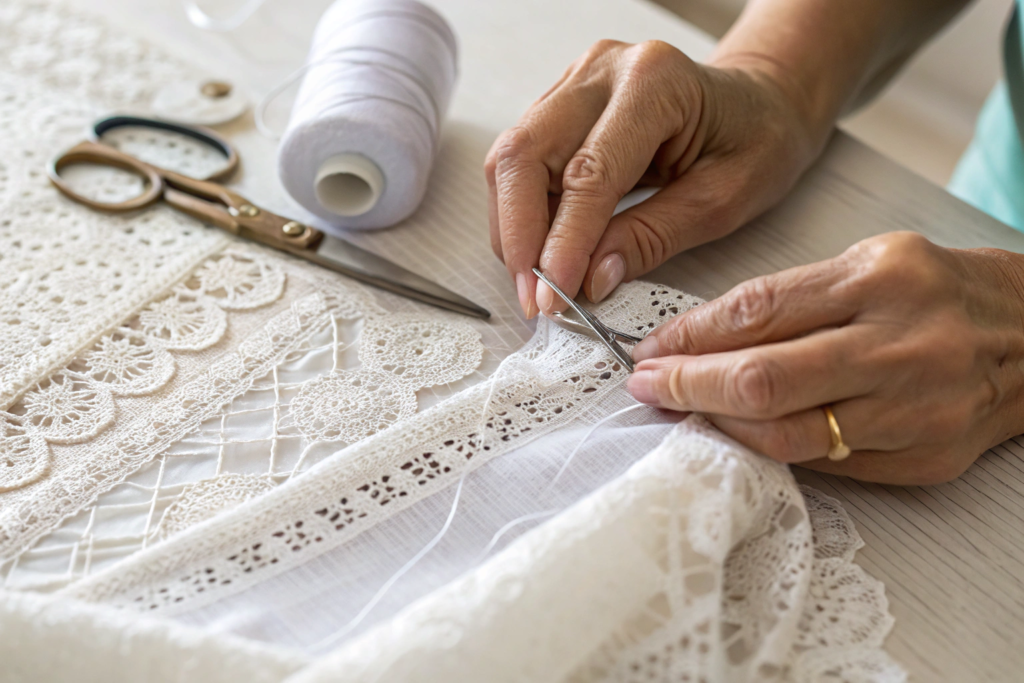
How Do You Execute a Perfect French Seam on Sheer Lace?
The French seam is the gold standard for fine laces where both sides of the seam might be visible (as in an unlined sleeve or overlay). It encases the raw edges completely within a neat, narrow tunnel, leaving a clean finish on both sides. Here’s the breakdown:
- Stabilize: Lightly spray-baste a wash-away stabilizer under the seam line.
- First Stitch: Place lace pieces wrong sides together. Stitch a narrow seam, about 1/4 inch (6mm) from the edge. Use a Microtex needle and a slightly shorter stitch length (2.0 mm).
- Trim & Press: Trim the seam allowance down to about 1/8 inch (3mm). Press the seam open—use a pressing cloth and a low heat setting to avoid melting synthetic fibers.
- Encase: Fold the fabric along the stitched line, so the right sides are now together, encasing the raw edges. Press this fold neatly.
- Final Stitch: Stitch a second seam about 3/8 inch (1cm) from the fold, capturing the raw edges inside. Press the finished seam to one side.
For a US-based contemporary womenswear client, we recommended this for their geometric laser-cut lace skirts. The interior was as clean as the exterior, which was a major selling point for their high-end market. It takes practice but is worth the effort for luxury finishes.
When is a Zigzag or Overlocked Seam Acceptable?
For fully lined garments or areas where the seam will never be seen (like a bodice lining), a cleanly finished seam that prevents fraying is sufficient. A narrow zigzag stitch or a 3-thread overlock/serger stitch can be efficient and effective. The critical tips:
- For Zigzag: Use a fine, short, and narrow zigzag. Test on scrap to ensure it doesn’t distort the lace.
- For Serger: Use a fresh, sharp serger needle. Always stabilize the lace with a wash-away stabilizer fed through the serger along with the fabric. This prevents the lace from being chewed up or stretched out by the feed dogs and knives. We supply miles of lace to activewear brands who use this method with stretch mesh lace, but they always pair it with a water-soluble stabilizer for a flawless run.
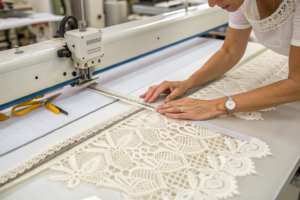
How Do You Apply Lace as an Overlay or Appliqué?
This is where lace truly sings—as a decorative layer atop another fabric. The key challenge is to attach it securely without the stitching looking clumsy or detracting from the lace pattern. You’re not just joining; you’re embellishing. Techniques need to be nearly invisible or incorporated as a design element.
Whether you’re applying a large lace motif to a bodice or creating a sleeve entirely from lace overlay, the method revolves around secure anchoring and clever stitching. The base fabric (the “underlay”) must be compatible in weight and drape, and your stitching should follow the contours of the lace’s own design to hide in plain sight.
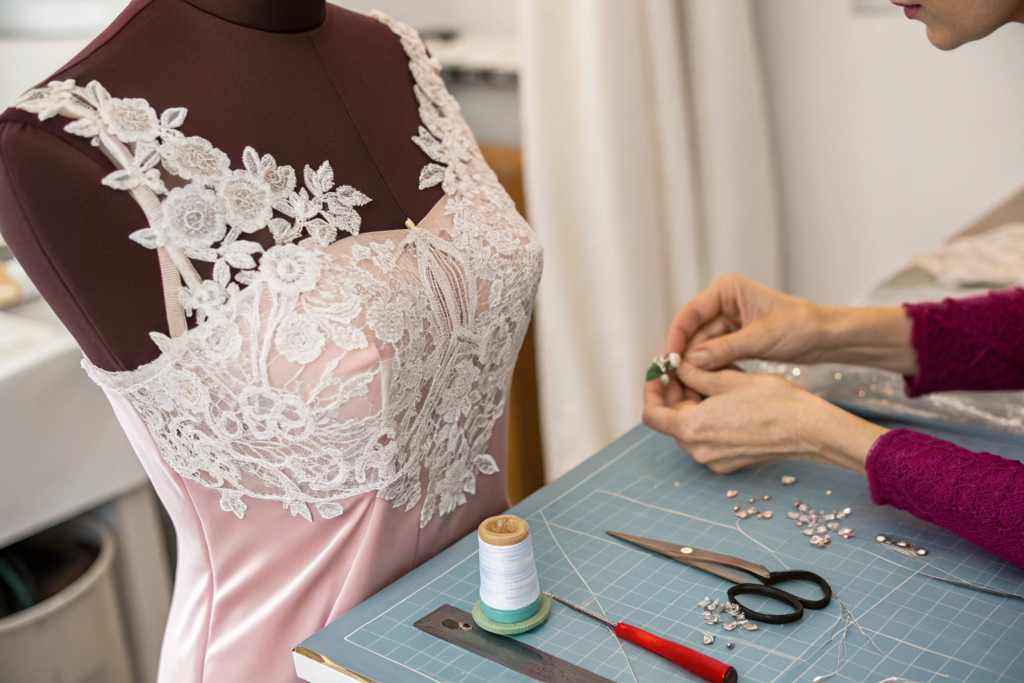
What is the Secret to Invisible Lace Appliqué?
The secret lies in the bobbin thread and stitch path. For a truly invisible hold, use a monofilament (invisible) thread in the needle and a thread that matches your base fabric in the bobbin. Set your machine to a very narrow, short zigzag or a blind hem stitch.
- Secure: Baste or use temporary adhesive spray to hold the lace motif in place on the right side of the base fabric.
- Stitch: Carefully stitch around the inner edges of the lace motif, following its natural outlines. Don’t stitch around the outside perimeter—that can create a stiff, outlined look. Instead, stitch within the pattern where the thread will be hidden by the lace’s own texture.
- Trim: Once securely attached, turn the work over and from the wrong side, carefully trim away the excess base fabric from behind the lace motif, leaving a small seam allowance. This reduces bulk and leaves only the lace visible from the right side. This technique is magic for creating illusion necklines or decorative panels.
How Do You Finish the Raw Edges of a Lace Overlay?
For edges that are meant to be seen, like the hem of a lace overlay skirt, a clean finish is paramount. Two professional methods stand out:
- Narrow Rolled Hem: Using a rolled hem foot on your sewing machine creates a tiny, finished edge ideal for lightweight laces. It takes practice but gives a couture finish.
- Hand-Slip Stitched Edge: For ultimate control and invisibility, especially on curved edges, folding the raw edge under by about 1/4 inch and securing it with a hand slip stitch using fine silk or polyester thread is unbeatable. It’s time-consuming but results in a flawless, soft edge that moves perfectly with the lace. Many of the haute couture pieces we supply lace for rely on this meticulous hand-finishing.
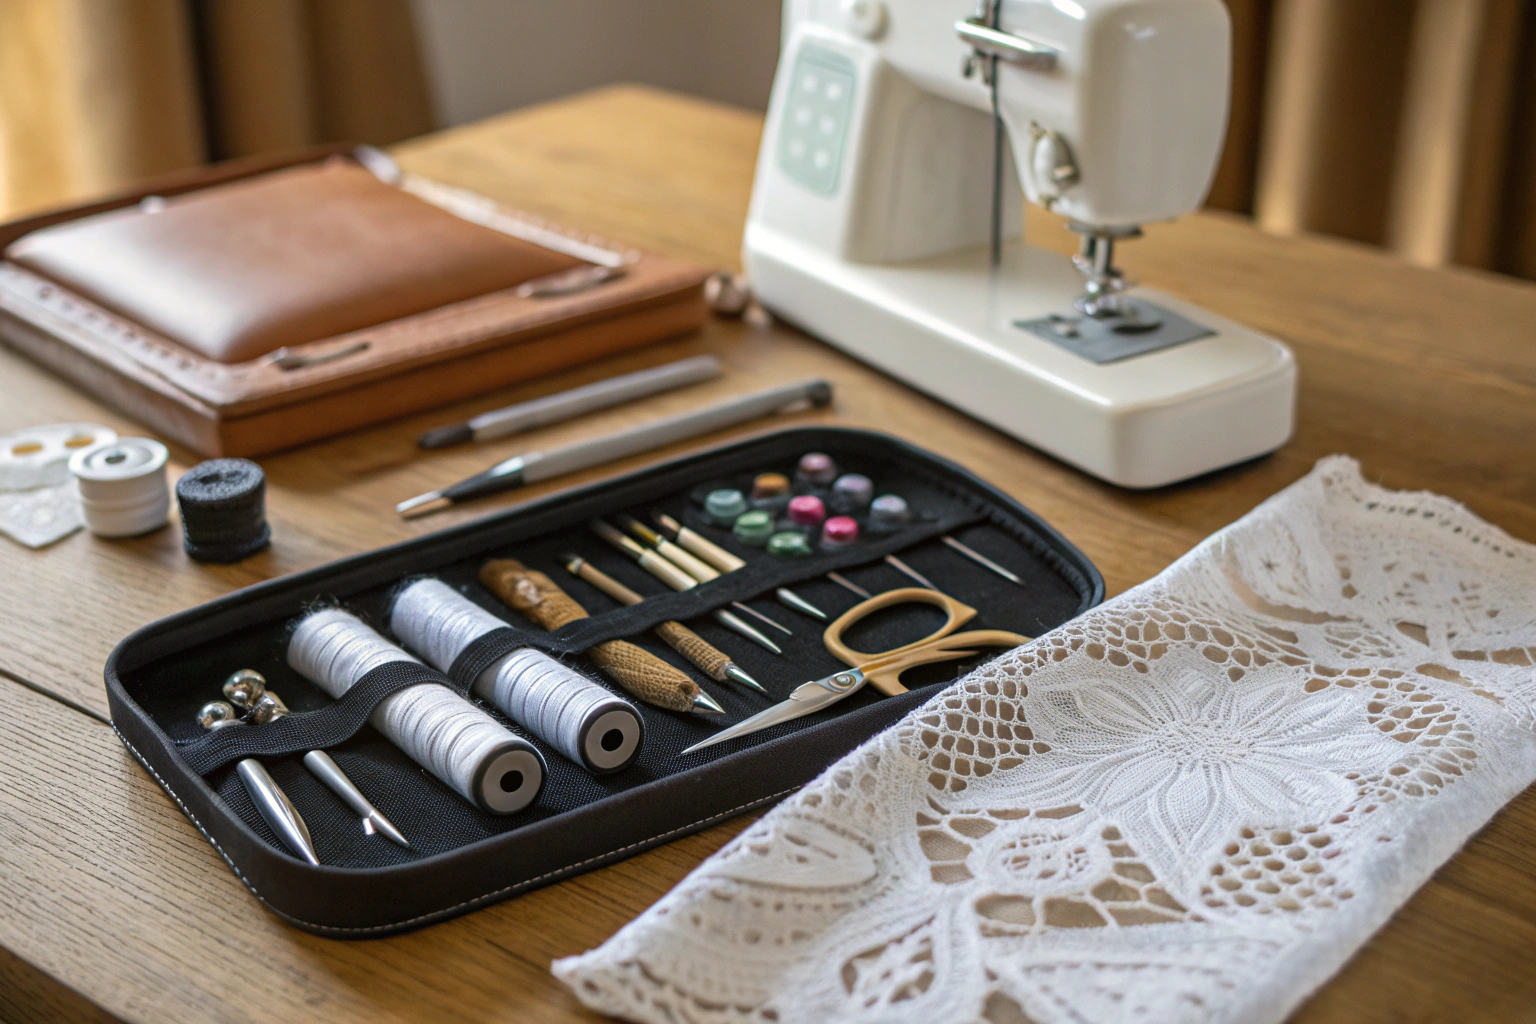
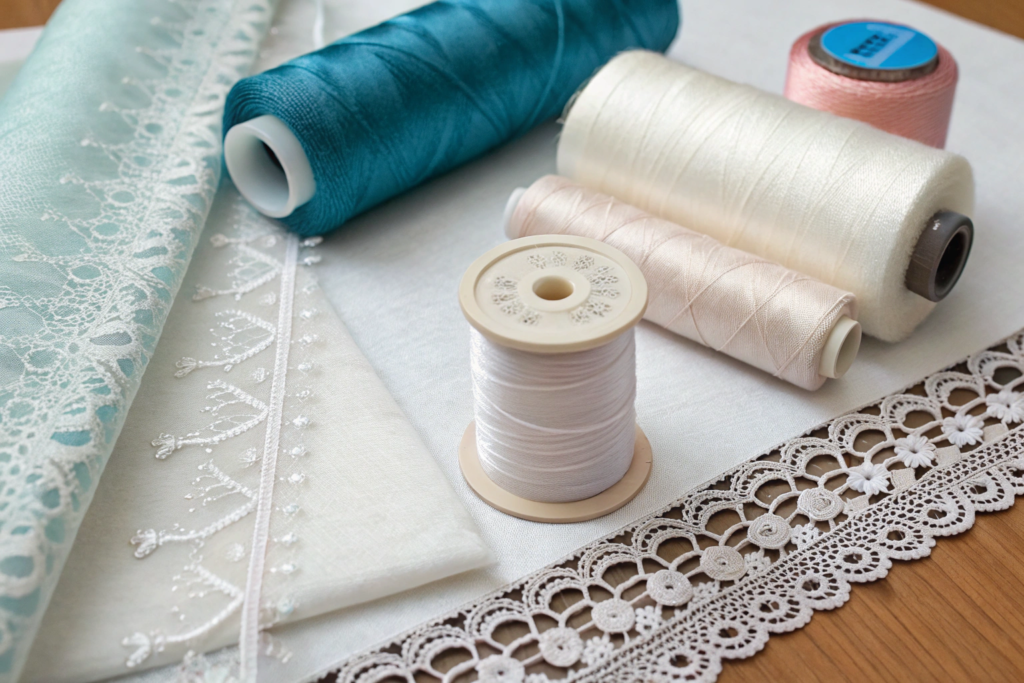
What Stabilizers and Threads Are Non-Negotiable?
Trying to sew lace without the right support materials is like building a house on sand—it will shift, pucker, and collapse. Stabilizers and threads are the unsung heroes that make or break your project. They provide the temporary structure needed for clean stitching and ensure the seams hold over time.
Stabilizers come in various forms: wash-away, tear-away, and heat-away. Your choice depends on the lace and the seam’s location. Thread choice is equally critical; a thick thread will look clumsy and create bulk, while a weak thread may break. The goal is harmony: the support materials should do their job and then disappear or integrate without a trace.
Water-Soluble vs. Tear-Away: Which Stabilizer When?
- Water-Soluble Stabilizer: This is your best friend for most lace sewing, especially for intricate seaming, appliqué, or embroidery on lace. You hoop it with the lace or place it underneath, sew, and then gently rinse it away with water. It leaves zero residue and is perfect for unstable or stretchy laces. We always include a small sample roll with bulk lace orders for our boutique clients—it’s that essential.
- Tear-Away Stabilizer: Use this for more stable laces where the stitching area is not too dense and the lace can withstand the gentle tearing action. It provides excellent support for zipper installation or buttonholes on lace. Be sure to tear it away carefully, pulling perpendicular to the stitching line to avoid stressing the threads.
Why is Thread Weight More Important Than You Think?
Thread weight indicates thickness—the higher the number, the finer the thread. For lace, you want to go fine.
- General Construction: A 100-weight or 80-weight polyester thread is ideal. It’s incredibly fine yet strong, minimizing bulk and visibility in seams. Gütermann and Mettler make excellent options.
- Topstitching/Visible Stitching: Use a fine silk thread for a beautiful, soft sheen that blends with luxury fibers like silk lace. It’s weaker than polyester, so reserve it for decorative, low-stress areas.
- Bobbin for Invisible Work: Always wind a fresh bobbin with the same fine thread you’re using in the needle (or the matching bobbin thread for monofilament work). An unbalanced thread tension can cause puckering.
Conclusion
Mastering lace sewing is a specialized skill that pays dividends in quality and design sophistication. It requires the right tools—sharp Microtex needles, fine threads, and intelligent stabilizers—paired with techniques designed for delicacy and precision, like French seams and invisible appliqué. Remember, lace demands respect and a gentle touch; you are collaborating with the fabric, not forcing it into submission.
The journey from a daunting panel of lace to a finished garment you’re proud of is incredibly rewarding. Each perfectly executed seam is a testament to your craftsmanship. By internalizing these methods, you elevate not just a single garment, but your entire brand’s standard for luxury and detail.
If you’re seeking lace that is not only beautiful but also consistent and predictable in quality—making these sewing techniques even more effective—then let’s connect. At Shanghai Fumao, we provide more than just fabric; we provide technical support. Our team understands how our laces perform under the needle because we work with manufacturers every day. Let us supply you with lace that becomes the foundation of your next stunning collection. For technical specifications and sourcing the perfect lace for your sewing project, contact our Business Director, Elaine, at elaine@fumaoclothing.com. We’re here to ensure your vision is never limited by your materials.