As a factory owner in Keqiao for over two decades, I’ve seen millions of meters of fabric roll off production lines. And let's be honest here—every single meter has the potential for defects. For buyers, especially those managing global supply chains from the US or EU, a single unnoticed flaw can ruin an entire garment batch, leading to chargebacks, wasted inventory, and damaged brand reputation. You're not just buying fabric; you're buying confidence in your final product.
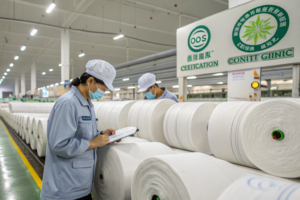
So, what are the most common fabric defects and how can you effectively inspect for them? The most frequent issues fall into four main categories: yarn and weaving/knitting defects, dyeing and printing defects, finishing defects, and contaminations. A proper inspection combines standardized visual methods (like the 4-point or 10-point system) with technical lab testing to catch problems before they ship. At Shanghai Fumao, our QC team catches over 200 minor defects daily, preventing them from reaching clients like you.
Understanding these defects isn't just about spotting problems—it's about preventing them at the source. I’ll share the insider knowledge and practical steps that separate a smooth production run from a logistical nightmare. We’ll dive into the specific flaws, the inspection systems that matter, and how our integrated control from yarn to delivery makes the difference. You'll learn how to communicate quality standards to any supplier and protect your orders.
What are the most common yarn and weaving defects?
When yarn or the weaving/knitting process goes wrong, the fabric's very structure is compromised. These defects are often the most costly because they're fundamental. I’ve seen entire rolls of premium cotton poplin rejected because of recurring weaving faults that the factory missed. Buyers focused on how to source durable twill fabric for workwear need to be especially vigilant about these.
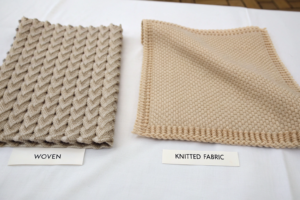
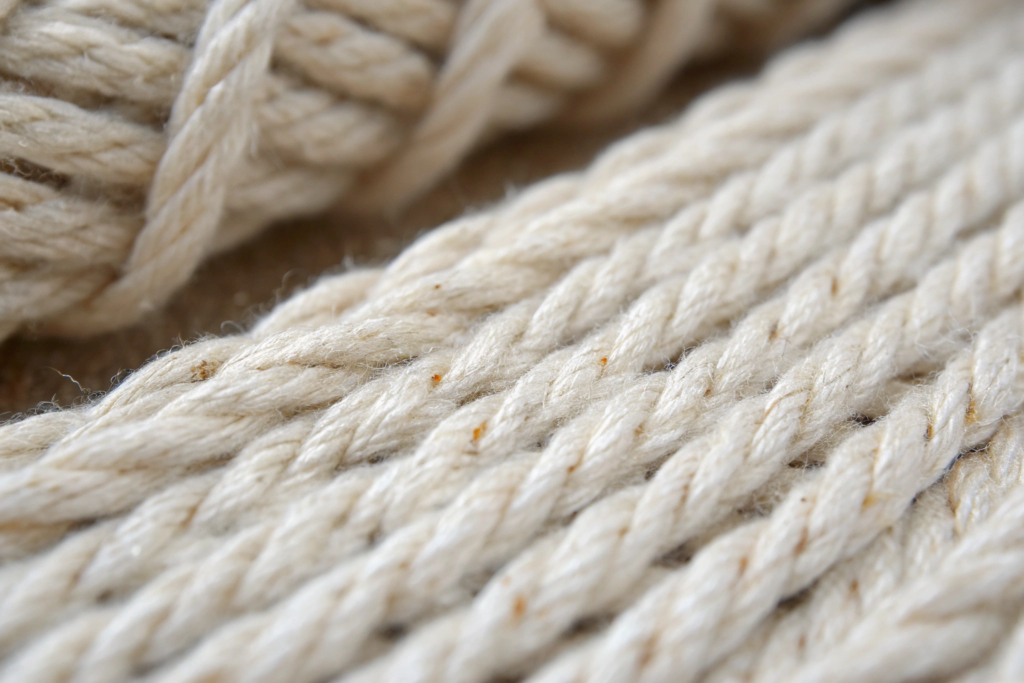
The most common yarn defect is slubs—thick, uneven places in the yarn that create bumps or thin spots in the fabric. Others include knots, neps (small tangles), and yarn variations that cause shading issues. In weaving, look for missing ends (a warp yarn that's absent) or broken picks (a missing weft yarn), which create obvious lines or gaps. Reed marks (visible warp lines) and starting marks (a horizontal band of irregular weave) are also frequent. In knits, a common and expensive flaw is a dropped stitch, which creates a run or ladder, much like in pantyhose.
How to identify slubs, knots, and neps during inspection?
Slubs are easy to feel with a hand run over the fabric surface; they create a rough, uneven texture. For visual inspection under good light, they appear as short, thickened places. Knots are small, tight bumps where yarns are joined. Neps look like tiny, tangled balls of fiber often embedded in the fabric. The key is consistent lighting and a slow, methodical visual scan. We use backlit inspection tables at Shanghai Fumao that make these flaws stand out clearly. For critical orders, like the 10,000-meter run of organic cotton jersey for a Dutch sustainable brand last July, we performed a 100% inspection on these points. This proactive catch saved them from about 3% potential garment waste, which they estimated was worth over €15,000. A great resource for understanding these basics in detail is the Textile Institute's glossary of fabric defects, which standardizes the terminology we all use.
What causes missing ends or broken picks in woven fabric?
Missing ends or broken picks are typically machine-related. A missing end happens when a single warp yarn breaks and isn't repaired by the loom's automatic stop-motion device. A broken pick occurs when the weft yarn breaks or isn't inserted properly. These often point to outdated loom maintenance or poor yarn strength. I always advise clients to ask about the age and type of weaving machines. A factory using old rapier looms is more prone to these issues than one with newer air-jet or projectile looms. This is why we invest in modern equipment—it directly reduces these defects. To understand the machinery side better, forums like Textile News and Discussions on Fibre2Fashion often have technical threads where engineers discuss troubleshooting these exact problems.
How do dyeing and printing flaws typically manifest?
Color is the first thing a customer notices, and flaws here are immediately visible. Dyeing and printing defects are the number one reason for customer complaints in our experience. They can range from subtle, costly shade variations to glaring misprints. A client sourcing how to ensure colorfastness in dyed linen for home decor once faced a nightmare where their beige curtains varied from roll to roll, making installation impossible.
The major dyeing defects include shade variation (side-to-side or end-to-end), dye streaks, color bleeding, and poor colorfastness. Printing flaws involve misregistration (colors out of alignment), blurry patterns, color smearing, and missing print areas. A particularly tricky one is "tailing," where the color intensity fades along the length of the fabric. Another common issue is "crocking," where dye rubs off onto other surfaces. These problems often stem from water quality, dye chemistry imbalances, improper fixation, or printing machine errors.
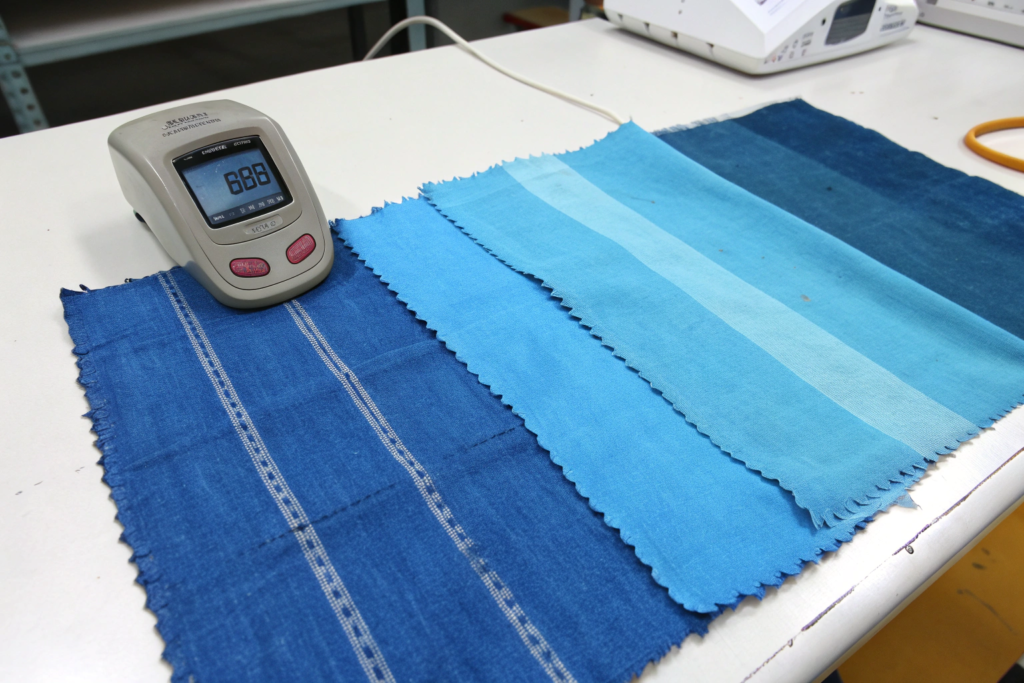
What's the difference between side-to-side and end-to-end shade variation?
Side-to-side (S/S) variation means the color shade is different from one selvedge to the other across the fabric width. End-to-end (E/E) variation means the beginning of the fabric roll is a different shade than the end. S/S is often caused by uneven pressure or temperature across the dyeing machine (like a jet dyeing machine). E/E is usually due to exhaustion of the dye bath or changes in dyeing parameters over time. For example, in November 2022, a UK fast-fashion brand rejected a 5,000-meter shipment of polyester satin because of severe E/E variation. The factory had tried to extend the dye bath beyond its capacity to save costs. To prevent this, we use batch dyeing with strict lot control and advanced spectrophotometers to measure every few meters. You can learn more about controlling these variables from resources like the American Association of Textile Chemists and Colorists (AATCC) technical manuals.
How can you test for colorfastness and crocking easily?
Colorfastness testing isn't just for labs; you can do simple checks on-site. For crocking (rubbing fastness), take a white cotton cloth and vigorously rub it against the fabric for 10 seconds. Examine the white cloth for color transfer. AATCC Test Method 8 is the formal standard for this. For washing fastness, a simple home test is to sew a sample to a white fabric and wash it at the intended temperature. Check for bleeding. However, for guaranteed results, especially with certifications like GOTS, you need a proper lab. Our CNAS-accredited lab runs these tests daily. We provided a full colorfastness test report for a babywear brand's organic cotton interlock that became a key part of their marketing. For a deeper dive into at-home quality checks, many small designers share practical tips on blogs like The Fashion Business Coach's guide to fabric inspection.
What finishing and contamination defects should you never ignore?
Finishing gives fabric its final hand feel and performance, but errors here can ruin everything. Contaminations are foreign elements that shouldn't be there—they’re often the easiest for a final QC to spot but can be the most embarrassing if missed. Think of a hair embedded in a luxury wool coating or an oil stain on pristine white shirting.
Common finishing defects include over-shrinking or under-shrinking, improper heat setting (leading to dimensional instability), uneven softening or stiffening, and calendering marks (shiny patches from roller pressure). For functional finishes, flaws could be uneven water repellency coating or inconsistent antimicrobial treatment. Contaminations include oil, grease, or rust stains, loom waste (like bits of other yarns), human or animal hair, and even plastic fragments. In one memorable case, a series of small black dots—later identified as melted polyester from a stray thread—appeared on a light pink viscose satin, forcing a 2,000-meter re-make.
How can you test if a fabric's shrinkage is within tolerance?
Don't just trust the supplier's spec sheet. You can perform a simple wash test. Cut a precise 50cm x 50cm square from the fabric, mark it clearly, and wash/dry it according to the garment's care label instructions. Measure it again. The percentage change is the shrinkage. For example, if it's now 48cm wide, the width shrinkage is (50-48)/50 = 4%. Compare this to the allowance in your tech pack (e.g., "shrinkage must be ≤3%"). For knits, also test for relaxation shrinkage over 24 hours laid flat. We once helped a US activewear brand reformulate the finish on their polyester-spandex athletic knit to reduce shrinkage from an unacceptable 5.5% to a stable 2%, which was crucial for their sizing consistency in performance leggings. Industry standards like ISO 5077 detail the official test methods.
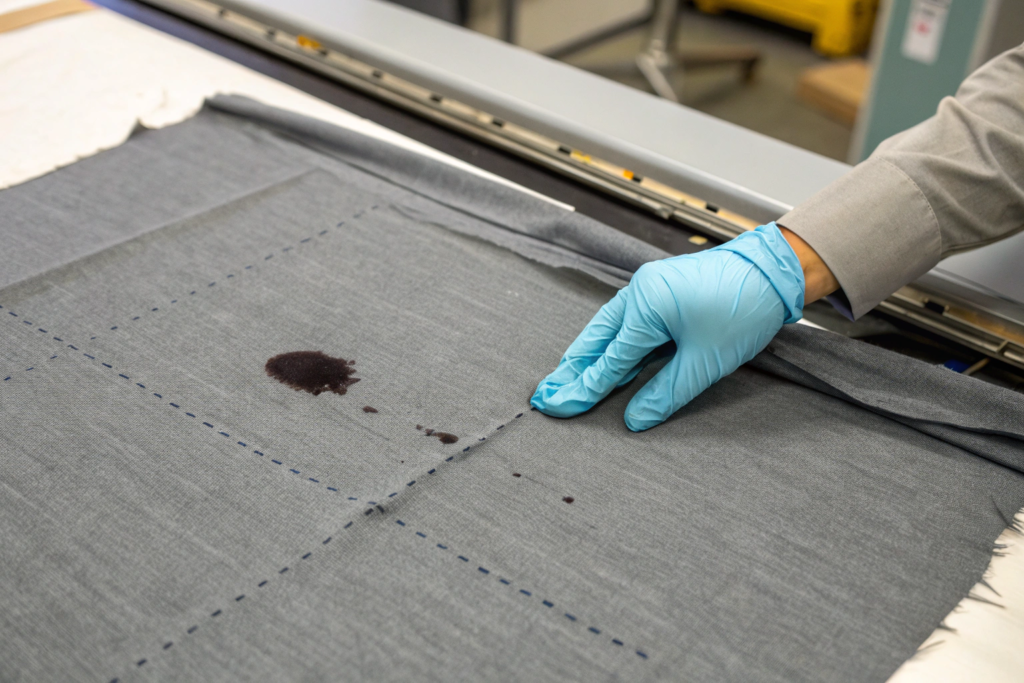
Why are oil stains and foreign fibers so common, and how to find them?
They're common because textile machinery uses lubricants, and factories are bustling environments. Oil stains often appear as dark, localized spots with a sometimes "rainbow" sheen. Foreign fibers (like a black hair in white yarn) are often woven in during spinning or weaving. The best inspection method is, again, good lighting—especially a top-down light at a low angle, which makes these contaminants cast a shadow. For white or light-colored fabrics, UV lights can make certain oils fluoresce. A strict factory protocol, like clean-room zones for final inspection and regular machine maintenance, is the real solution. In our packaging area, we enforce a "no loose clothing or hair" rule. For more on factory audit checklists that cover these points, sites like QIMA's blog on manufacturing quality control offer useful templates.
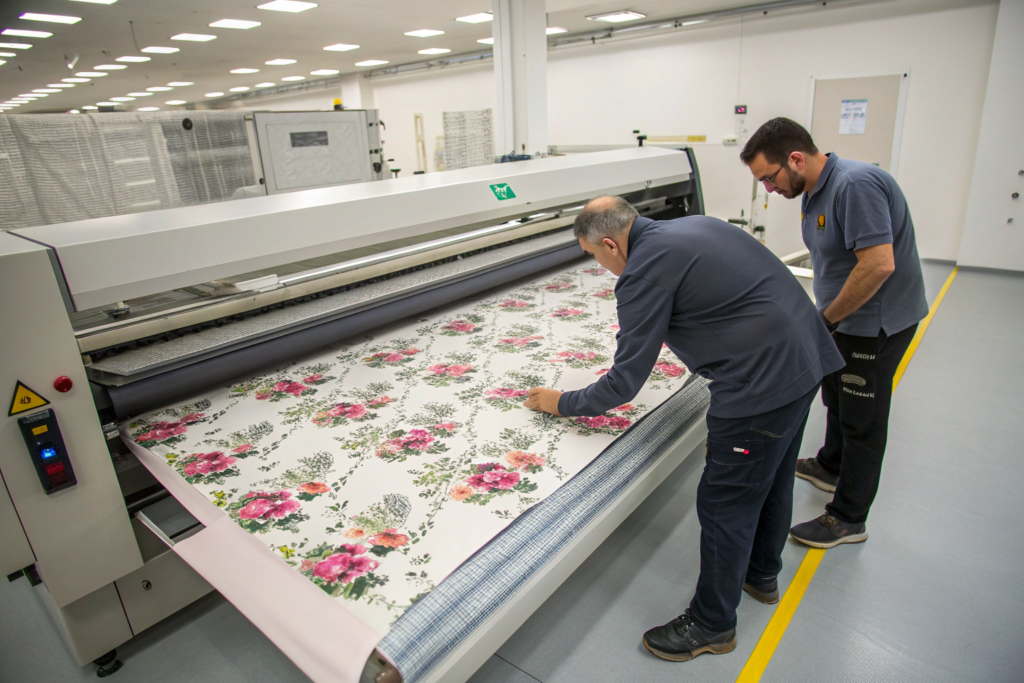
What are the best professional fabric inspection systems?
Relying on a quick glance is a recipe for disaster. The industry uses standardized systems to quantify defects, which is essential for fair dispute resolution and consistent quality levels. Choosing the right system depends on your fabric type and end-use. For instance, the 4-point system is almost universal for apparel fabrics, while the 10-point might be used for more critical industrial fabrics.
The two most widely adopted systems are the 4-Point System (AATCC/ASQC) and the 10-Point System (sometimes used for military specs). There's also the Graniteville "78" System. The 4-Point System assigns penalty points (1 to 4) based on the defect's size or length. The total points per 100 square yards are calculated, and if they exceed an agreed limit (e.g., 20 points per 100 yd²), the roll is rejected. The key is that the inspection must be done on a proper inspection machine with the fabric viewed at a specified speed and angle.
How is the 4-Point System scored and applied in practice?
Here’s how points are assigned:
- Defects up to 3 inches: 1 point
- Defects over 3 inches, up to 6 inches: 2 points
- Defects over 6 inches, up to 9 inches: 3 points
- Defects over 9 inches: 4 points
A major defect (like a hole) automatically gets 4 points. No linear yard can have more than 4 points. The calculation is: (Total points in roll / Total yards inspected) * 100 = Points per 100 square yards. If your acceptance level is 20, and the score is 25, the roll fails. We use this for 99% of our orders. For a German outdoor brand's high-density nylon, we applied a stricter 15-point limit. This systematic approach gave them quantifiable data for their vendor scorecard. You can find a free printable 4-point system inspection checklist on several sourcing websites to bring to your next factory visit.
When should you use a 10-Point or Graniteville system instead?
The 10-Point System is much stricter. It assigns points based on the width of the defect relative to the fabric width, making it suitable for fabrics where any flaw is critical, like parachute nylon or medical textiles. The Graniteville "78" System is less common but is used for specific industrial fabrics where defects are classified by severity into different groups (Group I, II, III). For most fashion and apparel buyers, the 4-Point System is perfectly adequate. Venturing into these other systems is usually necessary only for highly technical contracts. A good place to understand niche applications is on technical textile industry forums, where engineers discuss these specifications.
Conclusion
Navigating fabric defects is a fundamental part of global sourcing. It's not about finding a mythical "zero-defect" supplier, but about partnering with a supplier that has robust, transparent systems to catch, quantify, and prevent these issues. From yarn flaws to final contamination, understanding what to look for and how to inspect empowers you to protect your investment and your brand's reputation. Remember, quality control is a shared responsibility—clear communication of your standards is as important as the inspection itself.
The most successful brands we work with treat their fabric supplier as a true extension of their own team. They share their tech packs, visit our facilities, and rely on our integrated control from the loom to the lab. They don't just buy fabric; they buy the security of knowing that a dedicated QC team with standardized systems is their first line of defense. If you're tired of playing defect detective and want a partner who delivers consistency and clarity, let's talk. Shanghai Fumao is built to be that reliable foundation for your supply chain. For a detailed discussion on how we can safeguard your next fabric order, please reach out directly to our Business Director, Elaine. She can walk you through our specific inspection protocols and how they align with your needs. You can email her at: elaine@fumaoclothing.com.