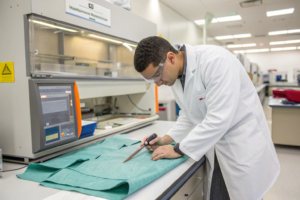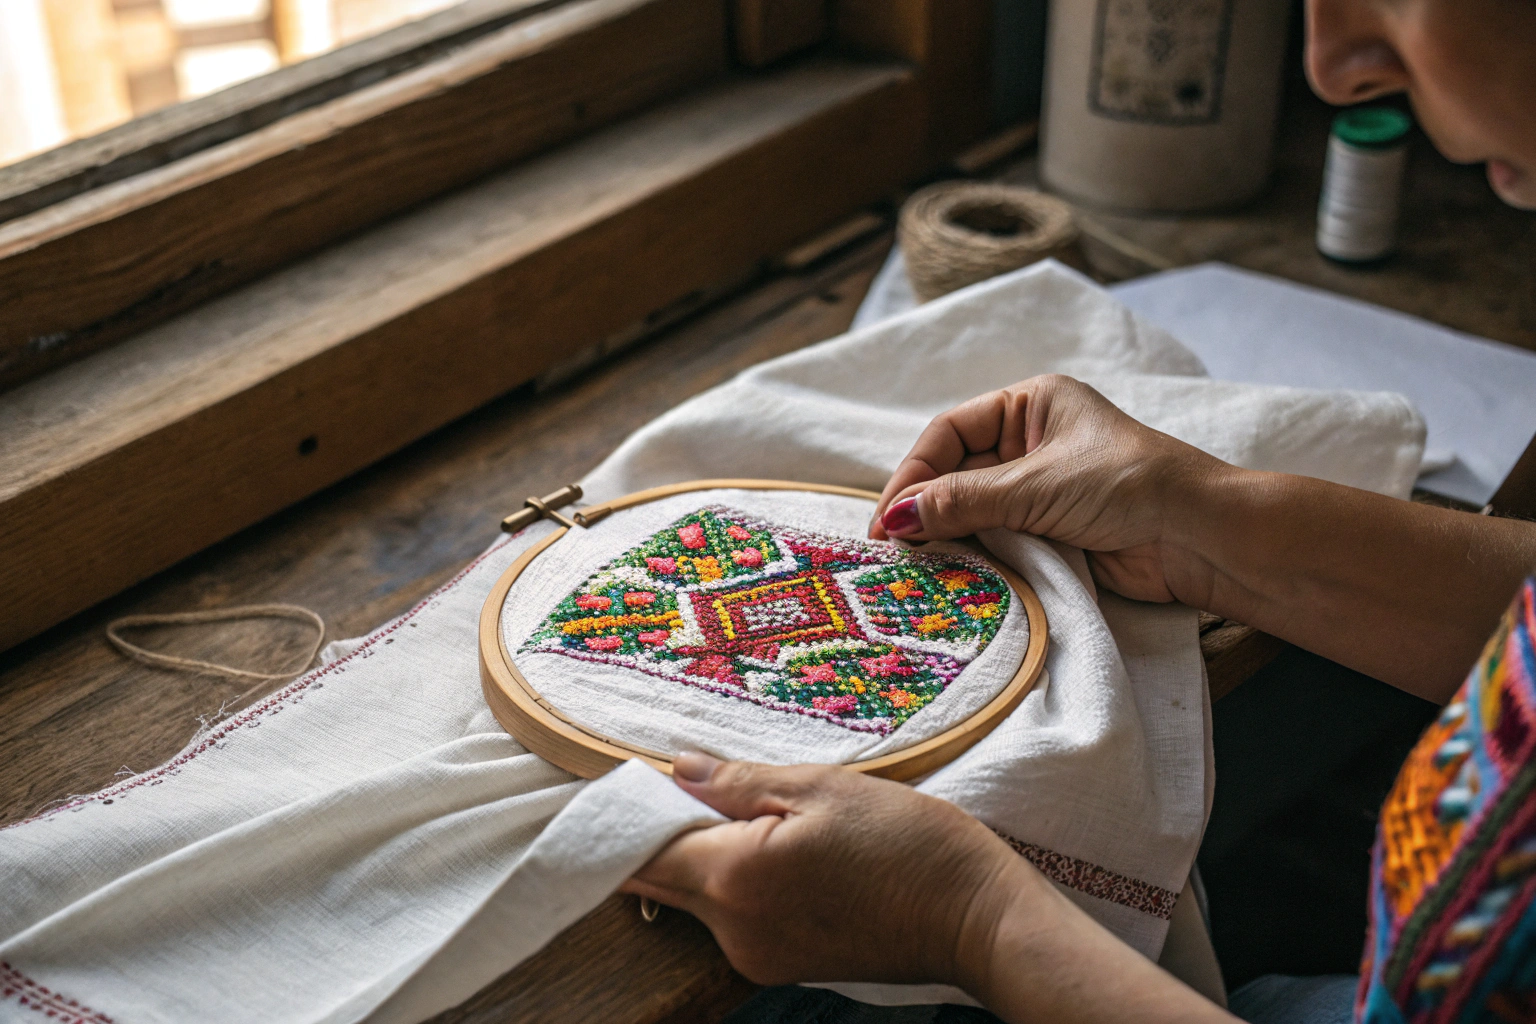
I have a confession to make. Before 2019, I thought embroidery was a dying craft. I saw it as a trim, an accent, a nostalgic decoration for children's wear and tourist souvenirs. Then I received a visit from a buyer representing a major Middle Eastern luxury brand. She opened a suitcase and pulled out a kandura—not the garment itself, but the fabric. It was a lightweight poly-viscose dobby weave, subtle and elegant. Then she pulled out the sleeve. The cuff was embroidered in a traditional Sadu pattern, dense with gold-colored metallic thread, the stitches so tight you could not see the ground fabric. "This is our heritage," she said. "Can you make this?"
We spent eight months developing that fabric. The base had to be stable enough to support 45,000 stitches per garment without puckering. The metallic thread had to withstand abrasion without tarnishing. The embroidery registration across multiple garment panels had to be perfect within 0.3mm tolerance. We failed twice. The third trial passed. Today, that client orders over 200,000 meters annually of custom-embroidered fabric for traditional menswear.
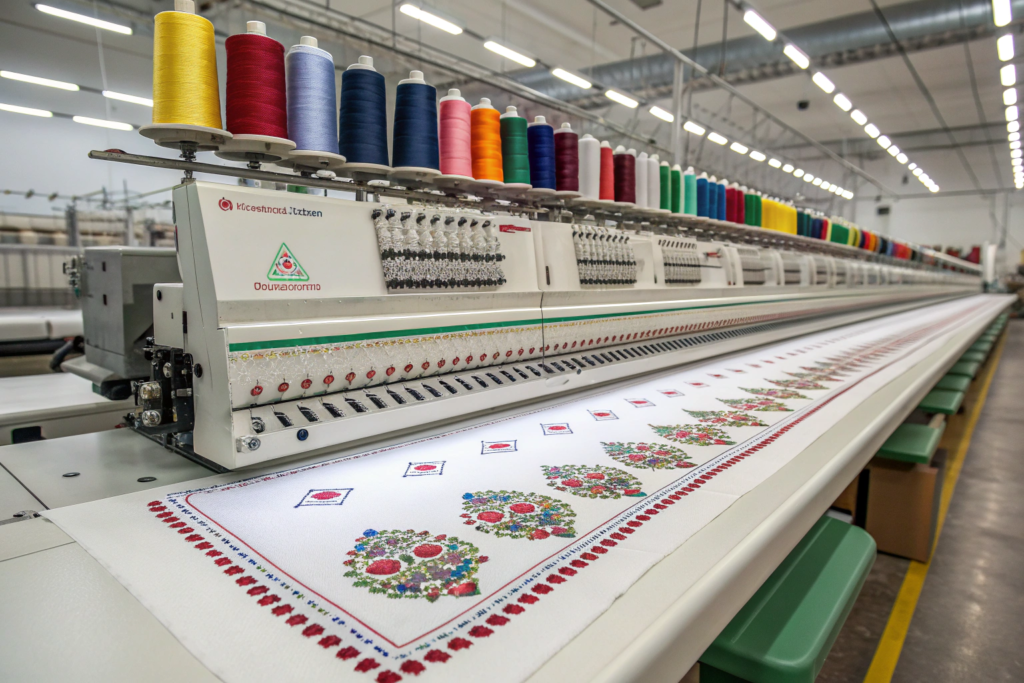
Custom embroidery fabric for cultural and traditional designs is a specialized discipline. It is not the same as sourcing a printed digital fabric or a solid dyed piece. The interaction between base cloth, backing, thread, stitch density, and design registration requires deep technical knowledge. One wrong choice—a backing too stiff, a needle too hot, a stabilizer that dissolves in the wrong humidity—and thousands of meters of fabric are scrap.
This article is for buyers who need to source embroidered fabrics that carry cultural significance. Whether you are developing qipao brocade for Lunar New Year, dashiki patterns for West African celebration wear, huipil-inspired motifs for Mexican heritage collections, or tartan-adjacent embroidery for Celtic fusion fashion, the engineering principles are the same. I will walk you through base fabric selection, stabilizer systems, thread choices, digital file preparation, and quality control protocols. I will also tell you the hard truths about minimums, lead times, and why you cannot rush perfection when culture is on the needle.
What Base Fabric Properties Are Essential for High-Density Embroidery?
Let me start with the most expensive mistake I see buyers make. They select a beautiful fashion fabric—a slubby linen, a fluid viscose challis, a delicate silk habotai—and they send it to an embroidery contractor. The contractor runs 50,000 stitches. The fabric puckers, distorts, or tears. The buyer blames the embroiderer. The embroiderer blames the fabric. The truth is: the fabric was never suitable for high-density embroidery.
Embroidery is a controlled destructive process. A needle punctures the fabric 500 to 1,000 times per minute. Each puncture displaces yarns. High-density embroidery (10,000+ stitches per design) imposes significant mechanical stress. The base fabric must have:
1. Dimensional stability. Low elongation under tension. High-yarn-count constructions (threads per inch) resist yarn displacement. We recommend minimum 60x40 count for cotton sheeting, 200T for polyester/nylon taffeta. Loose weaves shift. Slub yarns create uneven stitch appearance.
2. Compressibility. The fabric must accept the thread without excessive bulking. This is a balance. Too dense and the needle breaks; too loose and the design collapses. A balanced plain weave or a high-density twill is optimal.
3. Heat resistance. High-speed embroidery generates friction heat. Metallic and synthetic threads generate more heat. Base fabrics with low melting points (standard polyester, some nylons) can fuse or yellow. We recommend cotton, cotton-poly blends, or heat-set polyester specifically engineered for embroidery.
4. Colorfastness to crocking. The embroidery hoop applies pressure. If the base fabric has poor rub fastness, color transfers to the embroidery thread during stitching. This is especially problematic for dark bases with light thread.
5. Pilling resistance. Not directly related to embroidery, but relevant for end-use. Fabrics that pill easily will show fuzz around embroidered edges within weeks.
Our recommendation matrix:
-
For high-density, all-over embroidery (traditional Middle Eastern, South Asian formalwear): 140-180gsm poly-viscose or poly-cotton plain weave, 75x55 thread count minimum. Synthetic blend provides stability; viscose adds softness and dye affinity.
-
For medium-density, placement embroidery (brand logos, chest motifs): 120-160gsm cotton twill or cotton-poly poplin. Twill structure hides needle holes better than plain weave.
-
For delicate, low-density embroidery (bridal, heirloom): 60-100gsm silk organza or fine cotton batiste. Requires water-soluble topping and extremely careful tension control.
In 2022, a client from the UAE requested 20,000 meters of embroidered fabric for men's prayer caps. The design density was extreme—over 120,000 stitches per cap. Standard poly-cotton failed; the fabric tore at the hoop. We developed a custom 180gsm polyester filament woven with a modified plain weave and a heat-set finish. Tear strength increased 40%. We now stock this base exclusively for high-density religious and ceremonial wear. The American & Efird Embroidery Technical Guide has an excellent section on fabric selection for different stitch densities, and we use it as a training manual for our junior technicians.
Why does my embroidered fabric pucker even when the base seems stable?
Puckering is the most common defect in custom embroidery, and it has four distinct causes. You must identify which one is affecting your production.
1. Structural jamming. The needle pushes yarns apart, creating a gap that does not close. This is a base fabric issue. The fabric count is too low, or the weave is too loose. Solution: Increase thread count or switch to a higher twist yarn.
2. Tension imbalance. The embroidery machine pulls the fabric in the hoop. The stitching pulls in the design. If the fabric is not stabilized, it distorts. Solution: Improve hooping technique, use appropriate backing, or reduce stitch density.
3. Yarn shrinkage. Some fibers, particularly viscose and certain cottons, shrink when exposed to the humidity and heat of the embroidery process. The fabric shrinks around the stitches, causing rippling. Solution: Pre-shrink the base fabric before embroidery, or use a stabilizer that accommodates movement.
4. Design density variation. A sudden transition from very dense stitching to very open areas creates differential tension. The dense area contracts; the open area does not. This causes 'tenting' or 'picture framing'. Solution: Redesign the artwork with more gradual density transitions, or add underlay stitching to distribute tension.
We run a simple hoop test on every new fabric-embroidery combination. We embroider a standardized 5cm square of satin stitch at 12 stitches/mm density. We measure the fabric distortion in both warp and weft directions. If distortion exceeds 2%, we adjust the stabilizer system or reject the fabric. This test takes 15 minutes and saves thousands of dollars in rework. The Brother Embroidery Technical Support Knowledge Base has diagnostic guides for common puckering issues that are machine-agnostic and very practical.
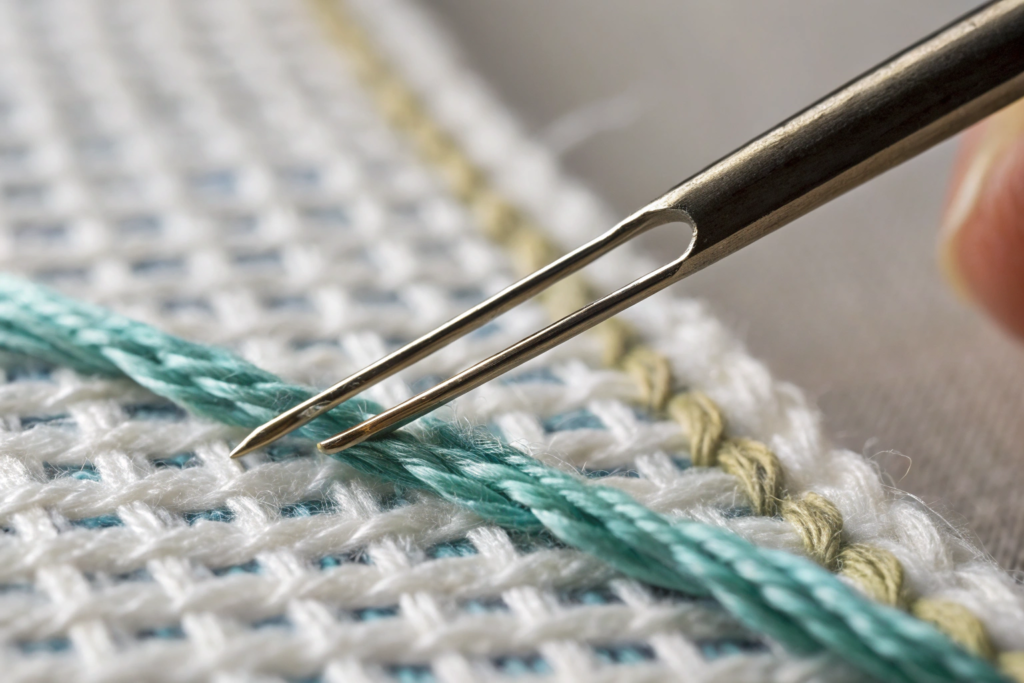
What is the difference between 'cut thread' and 'uncut thread' embroidery in traditional designs?
This distinction matters for both aesthetic and production efficiency.
Cut thread embroidery (also called 'chenille' or 'high pile' embroidery in some contexts) creates a raised, plush surface. The thread loops are cut during or after stitching, producing a velvet-like texture. This is traditional for letterman jackets, certain Native American powwow regalia, and some European folk costumes. It is high-impact, very durable, and extremely expensive. Production speed is slow, and the machinery is specialized.
Uncut thread embroidery (standard lockstitch embroidery) creates a flat or slightly raised surface. The thread interlocks with the bobbin thread, creating a smooth, dense stitch. This is 95%+ of all commercial embroidery. It is faster, more detailed, and less expensive.
For traditional cultural designs, both techniques are used. The Sadu embroidery I mentioned earlier is cut thread in some regions, uncut in others. The Islamic geometric embroidery common on thobes is almost always uncut, often done with metallic or silk threads. The floral motifs of Ukrainian rushnyk are typically uncut satin stitch.
We maintain both capabilities. Our Chenille machines are older—we bought them from a closing mill in Nagoya—but they produce a distinctive, bulky texture that flat embroidery cannot replicate. For a recent project with a Canadian Indigenous fashion house, we combined cut thread borders with uncut thread interior details to replicate traditional quillwork aesthetics. The client provided historical garments as reference. We digitized the patterns and scaled them for modern production. The collection won a major award. The Embroidery Trade Association's glossary of stitch types is a useful reference for understanding the technical differences.
How Do You Select the Correct Stabilizer and Backing?
If you take nothing else from this article, remember this: the stabilizer is not an afterthought; it is half the product. I have seen $50,000 orders of premium embroidered fabric rendered worthless because the purchasing manager tried to save $0.12 per meter on backing material.
Stabilizers (also called backings) serve three functions:
- Support the fabric during the embroidery process to prevent puckering and distortion.
- Control stitch formation by providing a consistent surface for needle penetration.
- Remain in the garment or be removed, depending on the application.
There are four main categories:
1. Tear-away backing. The most common. Stiff, non-woven material. After embroidery, the excess is torn away. Leaves a clean edge on stable, tightly woven fabrics. Not suitable for stretch fabrics or loose weaves. High-strength, low-residue.
2. Cut-away backing. Softer, woven or non-woven material. Excess is trimmed with scissors or laser. Remains under the embroidery permanently. Essential for knits, stretch fabrics, and high-stress applications (uniforms, workwear). Prevents edge curl and provides long-term stability.
3. Wash-away (water-soluble) backing. Dissolves completely in water. Used for freestanding lace, or for fabrics that cannot tolerate any residual backing (sheer silks, organza, certain heirloom textiles). Also used as topping on terry cloth or fleece to prevent stitches from sinking into the pile.
4. Heat-away backing. Dissolves with heat. Niche application, rarely used in commercial production.
For traditional and cultural embroidery, where designs are often dense and garments are intended for long-term use and even heirloom transmission, we strongly recommend cut-away backing for knits and high-grade tear-away for wovens.
Here is the nuance: Many traditional textiles are woven but have low structural integrity (handloom cottons, certain silks). Tear-away backing may be too aggressive and distort the weave. For these applications, we use a lightweight cut-away and trim extremely close to the stitching. This provides stability without the bulk.
Another critical factor: color. Standard backings are white or black. If your embroidered fabric is sheer or the garment is white, a white backing showing through is obvious. We stock 14 colors of cut-away backing to match ground fabrics for luxury clients. This adds cost and lead time, but the finish is invisible. A bride wearing a white qipao with white embroidery should not see gray backing through the fabric.
In 2021, we sourced 8,000 meters of handloom cotton from a cooperative in Bengal for a European fair-trade fashion brand. The fabric was beautiful—uneven, characterful, completely unsuitable for standard embroidery. The tear-away backing ripped the yarns. The cut-away backing was too visible. We eventually used a water-soluble topping with a lightweight water-soluble backing, embroidered the design, and then washed the entire fabric. The embroidery remained; the stabilizers dissolved. The fabric retained its handmade aesthetic. The client paid triple the normal embroidery cost and considered it a bargain. The Gunold Technical Stabilizer Guide is the industry reference, and we require our production team to read it annually.
Can I use the same stabilizer for silk that I use for cotton twill?
Absolutely not. This is a recipe for disaster.
Silk is protein fiber, delicate, and expensive. It has low tear strength and is easily damaged by needle heat. It requires:
- Water-soluble topping to prevent needle marks.
- Lightweight water-soluble or very lightweight tear-away backing.
- Reduced needle size (65/9 or 70/10).
- Reduced stitch density (maximum 8-10 stitches/mm).
- Slower machine speed (600-700 rpm maximum).
Cotton twill is cellulose fiber, robust, and forgiving. It tolerates:
- Standard tear-away or cut-away backing.
- Standard needle size (75/11 or 80/12).
- Standard stitch density (10-12 stitches/mm).
- Standard machine speed (750-850 rpm).
If you apply the cotton twill settings to silk, you will shred the fabric. If you apply the silk settings to cotton twill, you will waste production time and achieve acceptable but inefficient results. We maintain separate embroidery parameter libraries for every major fabric category. This is not micromanagement; it is process control.
What is 'topping' and when do I need it?
Topping is a temporary stabilizer applied to the face of the fabric, not the back. It prevents embroidery stitches from sinking into textured or high-pile surfaces.
You need topping when:
- Embroidering on terry cloth, towels, or velour.
- Embroidering on fleece, velvet, or chenille.
- Embroidering on deep-pile faux fur.
- Embroidering on heavily textured fabrics (slub weaves, bouclé).
- Achieving extremely crisp stitch definition on any fabric.
Topping materials:
- Water-soluble film. Clear, plastic-like sheet. Dissolves in cold water. Most common. Available in various thicknesses (40-80 micron).
- Heat-soluble film. Dissolves under heat press. Less common, useful for garments that cannot be wet-processed.
For traditional embroidery on ceremonial fabrics that may never be washed, heat-soluble topping is preferred. The garment is never exposed to water, so water-soluble film would remain trapped under stitches. We used heat-soluble topping for a Vatican-commissioned ecclesiastical vestment project in 2023. The client specified that the garment would never be laundered, only dry-cleaned on a delicate cycle. The topping dissolved completely at 120°C during the final finishing press.
What Threads Are Appropriate for Traditional and Cultural Embroidery?
Thread selection is both technical and cultural. You cannot substitute polyester for silk in a Japanese kimono and claim authenticity. You cannot substitute rayon for wool in a Scottish clan badge and expect the customer to accept it.
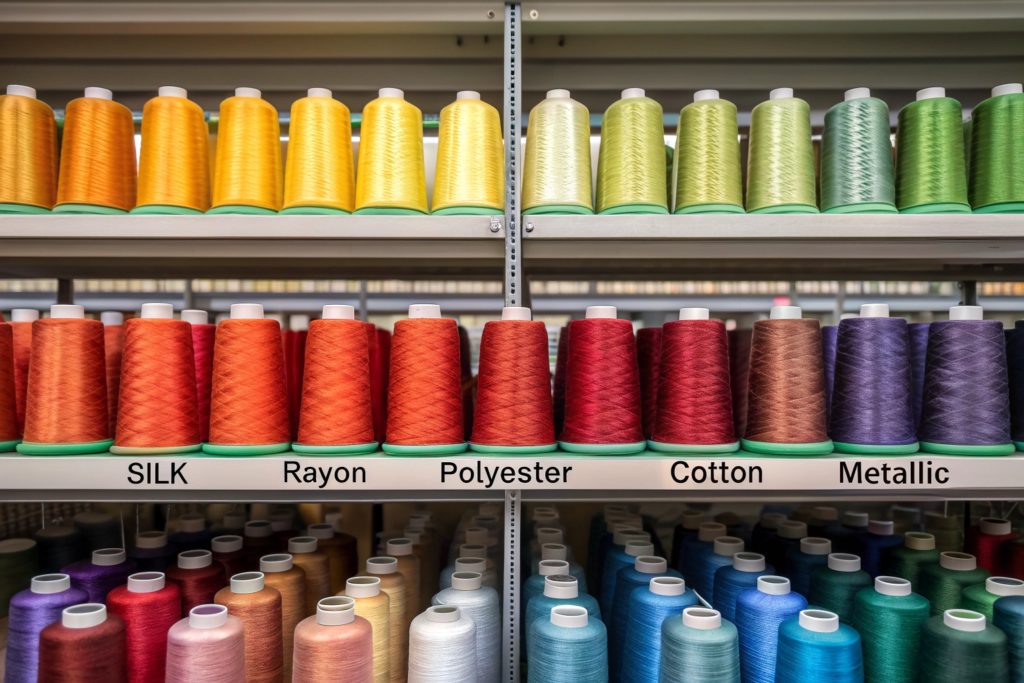
Fiber types:
Rayon (viscose). The most common embroidery thread worldwide. High luster, excellent drape, wide color range, moderate cost. Suitable for most commercial and traditional applications. Lower wet strength; not recommended for garments that will be frequently laundered.
Polyester. Increasingly dominant. High strength, excellent colorfastness, no shrinkage, suitable for frequent washing. Lower luster than rayon; matte finish. Preferred for uniforms, workwear, children's wear, and any application requiring durability.
Cotton. Matte finish, soft hand, traditional aesthetic. Lower strength; requires larger needle size. Used for heirloom embroidery, certain folk costumes, and eco-conscious brands. Mercerized cotton has higher luster.
Silk. The original luxury embroidery thread. Unmatched luster, softness, and drape. Extremely expensive, sensitive to needle heat, limited color range. Used for bridal, ceremonial, and haute couture applications. We stock 47 colors of 100% silk embroidery thread from a specialist supplier in Kyoto. Minimum order quantity: 2,000 cones. We lose money on silk thread. We stock it because our clients require it.
Metallic. Metal-coated synthetic core. High visual impact, difficult to sew. Requires specialized needles (metallic, coated, or titanium), reduced speed, and careful tension adjustment. The coating can abrade, exposing the core. Used for ceremonial, festive, and costume applications. Not recommended for high-wear areas.
Wool. Bulky, soft, matte. Used for crewel embroidery, certain ethnic textiles, and historical reproductions. Limited color range, slow production speed.
Color matching for cultural designs is a specialized skill. Pantone is not always sufficient. For a 2024 project replicating 19th-century Hungarian folk blouses, the client brought fabric swatches from a museum archive. The reds had faded over 150 years. We could not match the faded red; it would look like a mistake. We matched the intended original red based on historical dye recipes. The client approved. This is not colorimetry; this is anthropology.
We maintain a library of 3,200+ thread colors across 7 fiber types. When a client requests a specific cultural shade—'Mughal empire ruby', 'Andean indigo', 'Song dynasty celadon'—our colorists cross-reference historical sources, Pantone, and thread manufacturer archives. We do not always succeed on the first attempt, but we document every iteration. The Madeira Thread Color Matching Guide is excellent, but for true cultural colors, you need human expertise.
Why does metallic embroidery thread break constantly, and how do I prevent it?
Metallic thread is not your enemy, but it demands respect. The metal coating is abrasive. It creates friction in the needle eye and tension discs. It generates heat. It fatigues and fractures.
Our metallic thread protocol:
-
Specialized needles. Use titanium-coated or metallic-designated needles (size 80/12 or 90/14). The eye is larger and more polished. Change needles every 2-3 hours of running time, not every 8 hours.
-
Reduced speed. Maximum 600 rpm. At 750 rpm, breakage rate increases 300%.
-
Thread lubrication. Some metallic threads require silicone lubrication. We apply a thread conditioner (Sewer's Aid or equivalent) to the cone before loading.
-
Tension reduction. Loosen upper tension by approximately 30% from standard settings. Metallic thread should flow freely, not stretch.
-
Design simplification. Avoid very small stitches (<1.5mm length). The sharp angle increases abrasion. Avoid dense satin stitches wider than 6mm.
-
Bobbin thread adjustment. Use a lighter weight bobbin thread (60-70 wt) to reduce overall tension requirements.
For traditional Middle Eastern goldwork, the density and metallic content are so extreme that standard metallic thread is insufficient. We use genuine metal thread—fine copper or silver wire plated with gold, wrapped around a silk or polyester core. This is true passementerie, not embroidery. It is applied by hand, not machine. The cost is prohibitive for commercial production, but for high-end ceremonial garments, there is no substitute. We partner with a specialist atelier in Istanbul for these projects.
What is the maximum stitch density I can achieve on different thread types?
Stitch density is measured in stitches per millimeter or stitches per centimeter. Higher density = smoother, more solid appearance. Higher density also = more needle penetrations = greater fabric stress = higher risk of thread breakage.
General maximum density guidelines:
- Rayon/polyester, standard (40 wt): 10-12 stitches/mm for satin borders, 8-10 stitches/mm for fill areas.
- Cotton (40 wt): 8-10 stitches/mm maximum. Cotton is weaker and more prone to breakage at high density.
- Silk (50 wt): 12-14 stitches/mm achievable. Silk is surprisingly strong, but expensive.
- Metallic: 6-8 stitches/mm maximum. Beyond this, friction destroys the coating.
- Wool (30 wt): 4-6 stitches/mm maximum. Wool is bulky; high density creates excessive build-up.
For traditional high-density designs (Chinese opera costumes, certain South Asian wedding saris), we routinely exceed these limits. We achieve 14-16 stitches/mm using 50 wt polyester and specialized fine needles. The fabric must be specifically engineered for this density. The cost per garment is substantial. The result is heirloom quality.
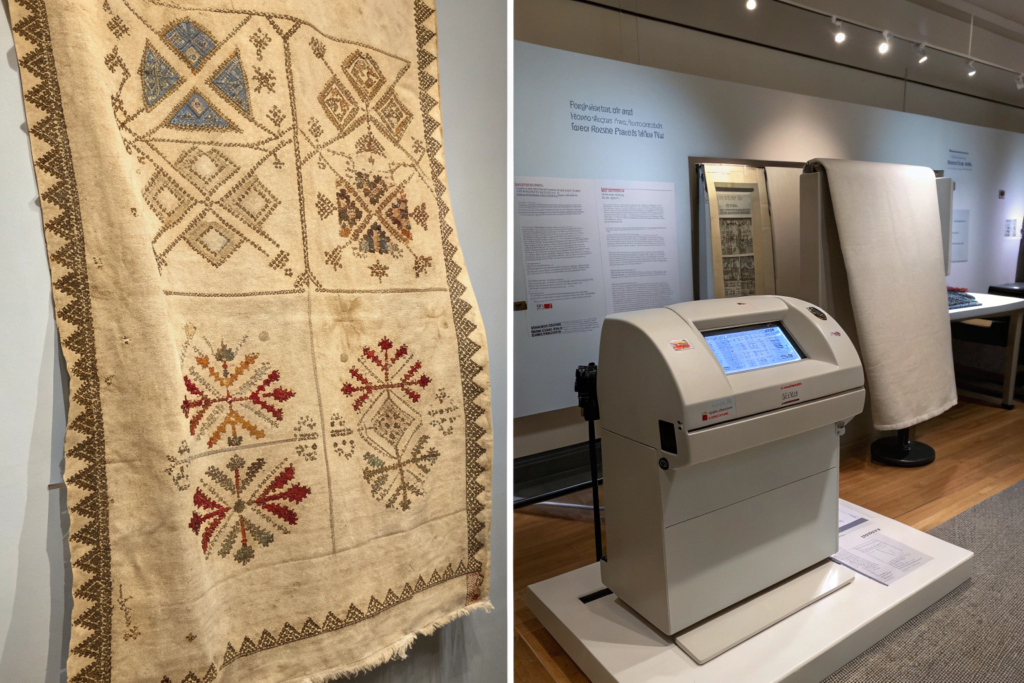
How Do You Digitize Traditional Cultural Motifs for Machine Embroidery?
This is where the soul of the design lives or dies. A beautiful motif, poorly digitized, becomes a stiff, lifeless imitation. An adequate motif, expertly digitized, becomes a textile masterpiece.
Digitization is the process of converting a visual design into stitch commands for an embroidery machine. It is not tracing. It is engineering. The digitizer must decide:
- Stitch type (satin, tatami, running, bean, etc.)
- Stitch angle
- Stitch density
- Underlay type and density
- Sewing sequence
- Color change order
- Jump stitch placement
For traditional cultural designs, the digitizer must understand the intent of the original artisan. Is a particular line meant to be crisp and sharp, or soft and organic? Is a fill area meant to be perfectly smooth, or does it require texture? Is the design meant to be viewed from a distance (ceremonial regalia) or intimately (bridal lingerie)?
Our digitization protocol for cultural projects:
-
Reference gathering. We do not accept a single JPEG. We request multiple references: historical examples, contemporary interpretations, color targets, and written descriptions of the intended effect.
-
Material specification. We must know the base fabric, backing, and thread type before digitizing. A design optimized for polyester twill will fail on silk chiffon.
-
Stitch angle simulation. For motifs with directional significance (prayer rugs, certain Indigenous patterns), stitch angle must follow the symbolic flow. We digitize accordingly.
-
Underlay strategy. For high-wear cultural garments (dance costumes, daily-wear traditional attire), we use heavy underlay to anchor stitches. For delicate ceremonial pieces, we use minimal underlay to preserve drape.
-
Sample stitch-out. We always run a physical sample. The screen rendering lies. Only the stitched fabric tells the truth. We require client approval of the stitched sample before production.
In 2023, a client requested digitization of a 17th-century Polish-Slavic floral motif from a museum photograph. The original was hand-embroidered linen. Our first digitization was too perfect, too regular. The client rejected it. "It looks machine-made," she said. She was right. We re-digitized with intentional irregularities—slight variations in stitch angle, subtle density shifts, imperfect symmetry. The second sample passed. The client needed the machine to imitate the human hand. We learned to embrace imperfection. The Wilcom Embroidery Studio Digitizing Guide is the industry standard software reference, but for cultural authenticity, you need more than software; you need cultural literacy.
Can I send a Photoshop file directly to the embroidery machine?
No. This is like sending a JPEG to a weaving loom. The machine cannot interpret pixels. The file must be converted to a machine-readable stitch file format (.dst, .emb, .pes, etc.) using specialized digitizing software.
Common beginner mistakes:
-
Oversized designs. A motif that looks perfect on a 300 dpi screen may be 30cm wide when printed. The digitizer must scale appropriately for the garment.
-
Excessive detail. Embroidery is not photography. Fine lines (<0.5mm) will either break or disappear. Small text (<5mm height) is illegible. We recommend simplifying complex designs for embroidery.
-
Color misinterpretation. The digitizer assigns stitch colors based on the file's color information. If your file has 47 shades of blue, the digitizer must reduce to 3-4 stitch colors. This requires aesthetic judgment.
-
Missing underlay. A design with no underlay will sink into the fabric, distort, and wear quickly. Underlay is invisible in the artwork file; it must be added by the digitizer.
Our recommendation: Provide vector files (Adobe Illustrator .ai, CorelDRAW .cdr) with colors separated into distinct layers. Indicate which areas are solid fill, which are borders, and which are texture. Provide physical dimensions in millimeters, not pixels. Provide thread color references (Pantone, Madeira, or Robison-Anton numbers). This reduces digitization time by 50% and increases first-pass approval rate by 70%.
What is the minimum line width for crisp embroidery?
For satin stitch (the standard for borders and text), minimum column width is 1.5mm. Below this, the needle penetrations overlap and the thread frays. The edge becomes ragged.
For running stitch (single needle line), minimum width is the thread thickness itself—approximately 0.4mm for 40wt thread. However, single running stitches are not very visible from distance. For legible text, we recommend 4mm+ height.
For traditional motifs with very fine details (Celtic knotwork, certain Persian miniatures), we use 60wt polyester thread (finer than standard 40wt) and reduce stitch density to 10 stitches/mm. This allows 1.2mm column widths. The thread is weaker; breakage risk is higher. Production speed is slower. This is a premium service.
What Are the Realistic MOQs and Lead Times for Custom Embroidery?
I am going to be direct: custom embroidery for traditional and cultural designs is not a fast-fashion category. If you need 500 meters of embroidered fabric in two weeks, I cannot help you. If you need 5,000 meters of a complex, high-density ethnic motif in eight weeks, we can talk.
Minimum Order Quantities:
-
Digitization: $75-$300 per design, one-time fee. Complex cultural motifs with multiple colors and high stitch counts cost more. We do not waive this fee. It pays for the digitizer's expertise.
-
Sample yardage: 5-20 meters minimum, depending on design repeat size. We run a sample strike-off, you approve, we proceed.
-
Production yardage: Our standard embroidery MOQ is 500 meters per design per colorway. This amortizes the machine setup, thread loading, and quality control. For high-density or multi-needle designs (12+ colors), we require 1,000 meters minimum.
-
For small brands and cultural preservation projects: We offer a shared-run program. We consolidate multiple clients' orders of the same base fabric and similar thread colors. The MOQ drops to 100 meters. The lead time extends to 12-14 weeks. You wait for the run to fill. Several Indigenous fashion studios in Canada and Aotearoa use this program.
Lead Times:
-
Digitization and sampling: 5-10 business days. Cultural motifs with historical verification requirements take longer.
-
Base fabric sourcing: 5-25 days, depending on inventory status.
-
Production scheduling: Our embroidery machines run 20 hours/day, 6 days/week. Current lead time for confirmed orders is 25-35 days from approval to shipment.
-
Total project timeline: Minimum 6 weeks for simple designs on stocked base fabric. Maximum 16 weeks for complex designs on custom-woven base fabric with specialty threads.
Expediting: We charge a 25% rush fee for orders requiring delivery in under 4 weeks. This disrupts our production schedule and requires overtime. We do not apologize for this fee. Rushed embroidery has higher defect rates. We prefer to do it right, not fast.
In 2024, a European heritage brand requested 2,800 meters of embroidered fabric for a museum exhibition reproduction of medieval vestments. The design was 14 colors, metallic thread, on a custom-woven wool blend. Total project timeline: 14 weeks from initial consultation to shipment. We delivered at week 13. The exhibition opened on schedule. The Custom Tailors and Designers Association of America has published guidelines on realistic lead times for embellished textiles, and they align with our experience.
Why does my embroidery order cost more per piece for 500 meters than for 5,000 meters?
Setup time is fixed. Loading the design onto the machine takes 30 minutes, regardless of whether you run 50 meters or 5,000 meters. Threading 12 colors takes 45 minutes. Tension calibration takes 20 minutes. Hoop alignment takes 15 minutes. These costs are amortized over the run length.
Thread waste is variable but not linear. We load full cones of thread for production. If your order uses 30% of a cone, we cannot reuse the remaining 70% for another client's color. It is dedicated to your order. Small orders carry proportionally higher thread waste cost.
Machine efficiency. A 5,000-meter order runs continuously for 5-7 days. The machine reaches steady-state efficiency. A 500-meter order runs for 12-14 hours. The startup and shutdown periods are a higher percentage of total runtime.
Our pricing model: We quote a setup charge plus a per-meter running charge. The setup charge covers digitization amortization, machine setup, and quality approval samples. The per-meter charge covers thread, stabilizer, machine time, and QC. This is transparent. We do not hide margins in inflated per-meter rates for small orders.
Can I supply my own base fabric for embroidery?
Yes, but with conditions and risk transfer.
Conditions:
- The fabric must meet our minimum specifications for dimensional stability and heat resistance. We will test your fabric at your expense before committing to production.
- You must supply sufficient quantity for the entire order plus 15% for setup, sampling, and waste. We will not partial-run an order because you underestimated fabric requirements.
- You must accept liability for fabric-related defects (puckering, dye migration, shrinkage) that are not caused by our embroidery process.
Risk transfer:
If you supply the fabric and it fails during embroidery, you own the failure. We charge for the machine time consumed. This is not punitive; it is compensation for lost capacity. If we supply the fabric, we own the failure. We replace the fabric and re-run the order at our cost.
Our preference: We supply the fabric. We control the entire supply chain. We have tested the base on our machines. We know the shrinkage characteristics. We have qualified the greige source. This is the lower-risk, higher-predictability option. It is also, in most cases, lower total cost because we do not need to mark up your fabric to cover our risk.
Conclusion
Custom embroidery fabric for traditional and cultural designs is not a commodity. It is not a quick-turn, low-MIQ, price-driven category. It is a partnership between the buyer, the digitizer, the embroiderer, and often the cultural community whose heritage is being represented. The technical challenges are real—fabric stability, thread selection, stabilizer engineering, density management. But the cultural challenges are equally significant. A misaligned stitch, an incorrect color, an inauthentic material choice—these are not just defects. They are disrespect.
At Shanghai Fumao, we have spent five years building the capabilities required to serve this market with integrity. We have invested in multi-head embroidery machines capable of 15 colors and 1,200 rpm. We have trained digitizers who understand the difference between Mughal and Ottoman arabesques. We have partnered with thread suppliers in Japan, Italy, and Turkey to access authentic materials. We have developed base fabrics specifically engineered to carry 100,000+ stitches per square meter without failure.
We do not claim to be the largest embroidery supplier in Keqiao. We are not. But we are the supplier that leading heritage brands, cultural institutions, and diaspora fashion houses trust when the design carries meaning.
If you are developing a collection that honors a textile tradition—whether it is Andean, Celtic, Han Chinese, West African, or any other—I invite you to contact us. Send us your reference images, your fabric requirements, your thread preferences. Tell us the story behind the design. We will tell you if we can do it justice.
Contact Elaine, our Business Director, to discuss your custom embroidery project. Elaine has overseen over 200 cultural embroidery programs and understands the sensitivity required for heritage work. Elaine’s email is: elaine@fumaoclothing.com. Tell her what tradition you are weaving into cloth.