You have the perfect garment base—a simple silk slip, a cotton bodice, a denim jacket. You have a stunning piece of lace. Combining them should be magical. But then you start: the lace puckers, the edges fray, the adhesive bleeds through, or the stitching looks clumsy. What was meant to be a high-end detail now looks homemade. This frustration stops many designers from fully leveraging lace's transformative power. I've seen stunning lace languish in warehouses because brands weren't confident in applying it correctly.
The secret isn't just in the sewing; it's in the preparation, the adhesive, and choosing the right technique for the lace and base fabric combination. With over twenty years supplying lace to factories worldwide, the team at Shanghai Fumao has gathered a masterclass in application techniques. This guide will move beyond basic tutorials. You'll learn professional methods for stabilizing, cutting, adhering, and finishing lace appliqués and overlays that elevate your garment from "crafted" to "couture."
Think of lace application not as an afterthought, but as an integral part of the design process. The techniques you choose will affect the drape, comfort, and longevity of the final piece. Let's dive into the methods that ensure your lace looks like it was always meant to be there.
What Are the Foundational Prep Steps Before You Even Cut the Lace?
The difference between a puckered mess and a flawless application is decided before the needle touches the thread. The first, non-negotiable step is pre-washing and stabilizing. You must pre-wash both your lace and your base fabric to remove any finishes and allow for potential shrinkage. There’s nothing worse than a perfect appliqué that distorts after the first wash because the base cotton shrunk more than the polyester lace. After washing, if your lace is particularly flimsy or stretchy (like a Raschel lace), applying a lightweight, tear-away stabilizer to the back before cutting is essential. This gives it body and prevents distortion during handling.
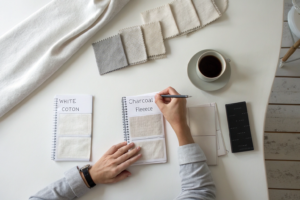
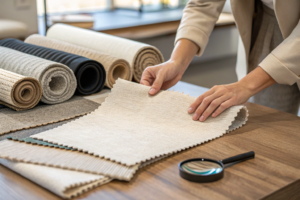
Next is pattern placement and marking. This is where artistry meets precision. Always lay your lace over the garment piece and move it around under good light to find the most beautiful and logical placement for the pattern motifs. Once decided, use fine, water-soluble pens or tailor's chalk to very lightly mark the outline on the base fabric. For complex appliqués, creating a paper template can save you from costly mistakes. At Shanghai Fumao, we often provide clients with a layout suggestion for our laces, showing how to optimize pattern repeats and minimize waste—a service that comes from seeing thousands of meters applied.
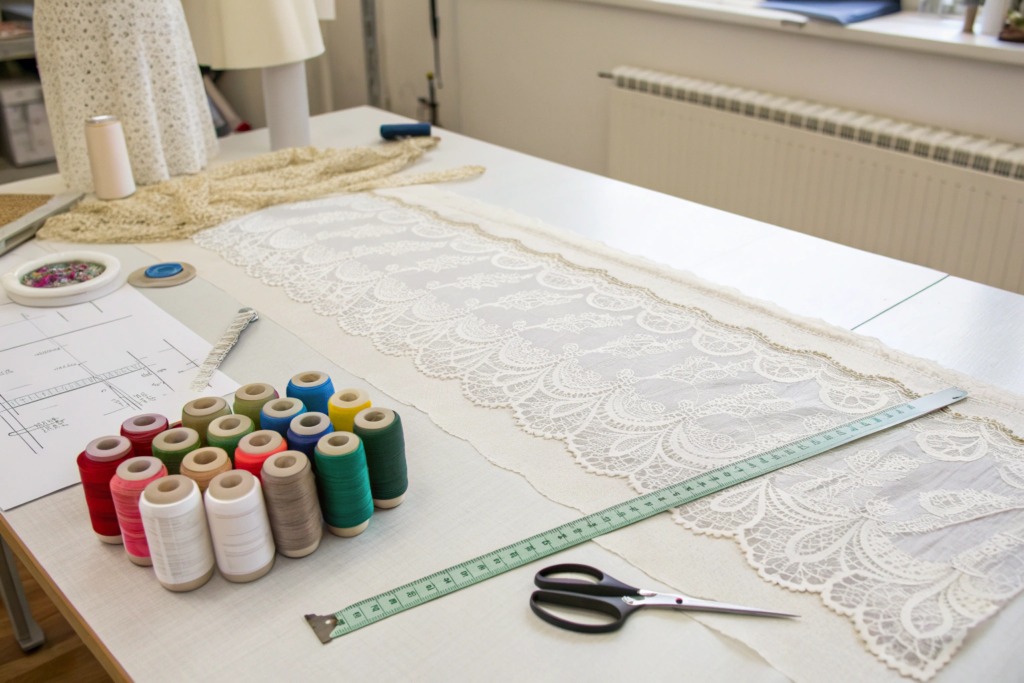
How Do You Cut Lace Cleanly for Different Application Types?
Your cutting method depends entirely on your end goal:
- For Appliqués (Cut-Out Motifs): Use very sharp, pointed embroidery scissors. Cut inside the outline of the motif, leaving a slight margin (1-2 mm) if you plan to turn the edge under. For a raw-edge appliqué (common with non-fraying synthetic laces), you can cut directly on the outline. The key is slow, precise cuts.
- For Overlays (Full Coverage): Here, you treat the lace as a fabric layer. Use pattern weights and a rotary cutter for long, straight edges. For curved seams, sharp fabric shears are best. Always cut with the lace and base fabric layered together if they are to be treated as one moving forward.
A pro tip we learned from a factory producing for a major French brand: for intricate appliqués, they use a fine, low-temperature soldering iron with a pointed tip to seal and cut synthetic lace edges simultaneously. This completely prevents fraying and creates a slightly rolled edge. It requires practice and ventilation but is a game-changer for production. For home studios, exploring specialty scissors for fabric applique work can make a significant difference in clean results.
Why is Fusible Adhesive Web Your Best Friend for Appliqué?
Before you sew, you need to fix the lace in place. Pins can distort delicate fabrics. Hand-basting is time-consuming. This is where fusible web (like Pellon Wonder-Under or HeatnBond) comes in. It's a thin, paper-backed adhesive that you iron onto the back of your lace appliqué. You then peel off the paper, position the appliqué, and iron it again to fuse it temporarily to the base fabric. This creates a stable, puckering-free foundation for stitching.
Crucial Note: Always use a pressing cloth and test the heat on a scrap first! Too much heat can melt synthetic lace or scorch natural fibers. The fusible web should be lightweight (sheer) for laces; a heavy one will make the area stiff. This step alone will elevate your work from amateur to professional. For larger projects, understanding how to choose the right fusible interfacing for different fabrics is a fundamental skill.
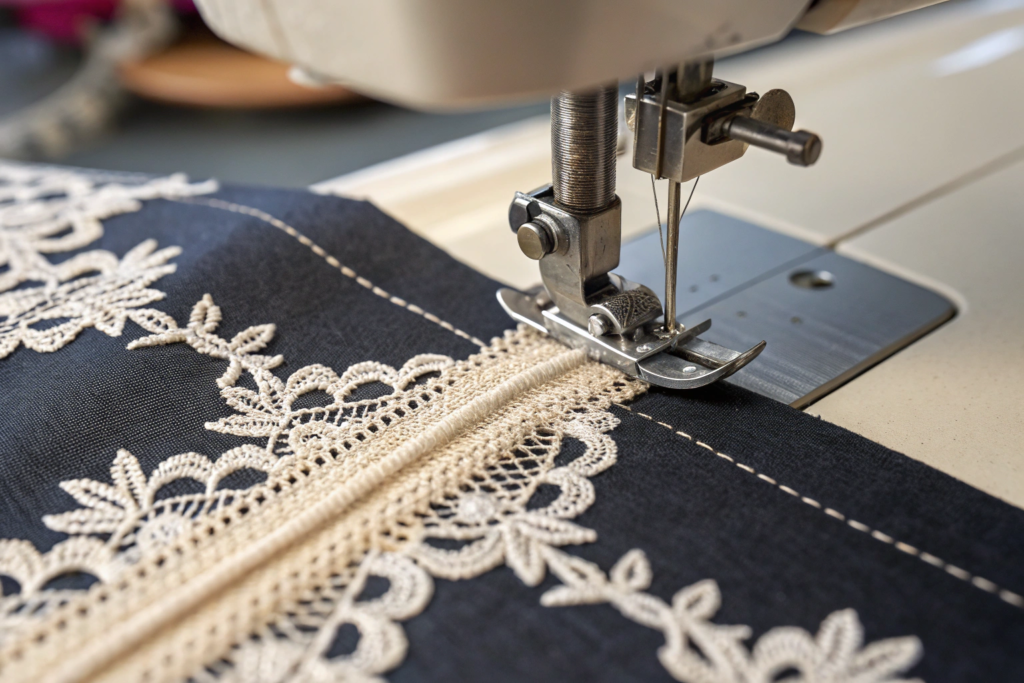
Mastering the Stitch: Sewing Techniques for Invisible and Decorative Finishes
With your lace securely fused, it's time for the permanent attachment. The stitching method serves two purposes: function (holding it on) and aesthetics (blending in or standing out). Your thread choice is critical—for invisible finishes, use a fine, color-matched polyester thread. For decorative effects, consider rayon embroidery thread, metallic thread, or even a contrasting color.
The most common and versatile stitch is the narrow, tight zigzag stitch (often called a satin stitch when set very close). This encloses the raw edge and prevents fraying. For a more invisible finish on non-fray lace, a straight stitch or small whip stitch just inside the appliqué edge works beautifully. For overlays where the lace layer is sewn into seams, treat the lace and base as one fabric layer and sew through both with a standard straight stitch.
How Do You Achieve a Truly Invisible Stitch by Hand?
For couture-level pieces or extremely delicate bases (like chiffon or fine silk), machine stitching can be too prominent. The solution is hand appliqué using a slip stitch, ladder stitch, or blind hem stitch. The goal is to catch only a few threads of the lace and the base fabric, making the stitch virtually disappear from the right side.
- Thread a fine needle with matching thread.
- Come up from the underside through the base fabric, right at the edge of the lace.
- Take a tiny bite (1-2 threads) into the lace, right along its edge.
- Go back down into the base fabric directly opposite.
- Pull gently to close the stitch.
This method is time-intensive but creates an unparalleled, luxurious finish. It's the technique we see used in the ateliers of our high-end European clients for bespoke garments.
What Are the Best Techniques for Applying Lace Overlays on Sheer Fabrics?
Applying lace over sheer fabrics like tulle, organza, or chiffon is a specific challenge because every stitch and adhesive is visible. The key here is often minimal or strategic attachment. Instead of adhering the entire lace piece, consider attaching it only at key points: along seams, at the neckline/armhole, or at the centers of major motifs. You can use tiny, almost invisible hand stitches or minute dots of fabric glue designed for sheers.
Another elegant method is to sandwich the sheer fabric between two layers of lace, creating a reversible effect or hiding attachment points. For a project with a New York-based eveningwear designer, we supplied a metallic lace that needed to float over a nude tulle bodice. Our recommendation was to attach it only at the seam allowances and at the points of the largest floral motifs using a single bead of clear, flexible fabric glue. The result was ethereal, with no stiffening from adhesives or visible stitch lines.
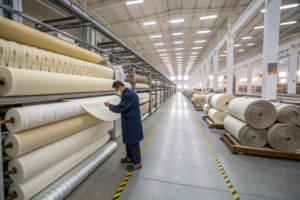
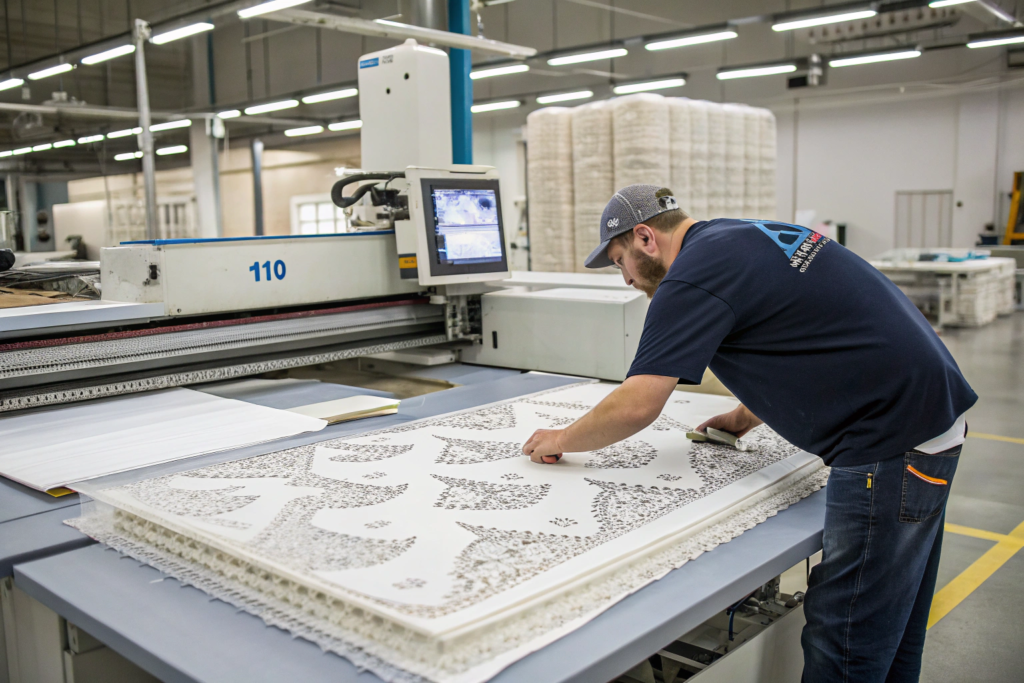
Solving Common Problems in Production and Bulk Application
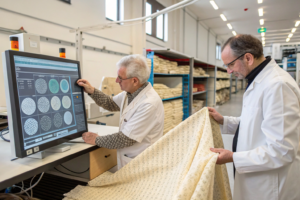
When you move from a single sample to bulk production, new challenges arise: consistency, speed, and cost. How do you ensure 500 appliqués are placed identically? How do you prevent adhesive residue from gumming up industrial machines? Factories use a combination of specialized machinery and rigid processes. Computerized embroidery machines can be programmed to stitch perfect appliqué shapes consistently, often including a tack-down stitch, a trim command, and then a final satin stitch edge—all automated.
For fusing, factories use large-format, temperature-controlled heat presses instead of irons. This ensures even heat and pressure across the entire piece. They also use custom-made metal or acrylic templates to ensure every worker places the lace appliqué in the exact same position on every garment. This level of precision is what separates mass production from artisan work and is crucial for brand integrity.
How Do You Handle Curved Edges and 3D Garment Shapes?
Applying flat lace to a curved seam (like a princess seam or a sleeve cap) or a 3D form like a bra cup requires clipping and notching. Just as you would with a fabric seam allowance, you need to make small clips into the lace's seam allowance (or into the lace itself if it's an overlay being eased) to allow it to lie flat without buckling. For extreme curves, the lace may need to be cut on the bias or a separate pattern piece may be needed.
A technical case from 2023: A sportswear brand wanted a lace overlay on a contoured leggings panel. The flat lace wouldn't conform to the body's curves, creating tension lines. Our solution was to develop the lace on a four-way stretch base mesh in collaboration with our knitting factory. The lace pattern itself was stable, but the ground fabric stretched, allowing it to conform perfectly to the 3D pattern. This is where material innovation meets application challenge.
What Are the Best Finishing Techniques for the Wrong Side?
A professional garment is judged by its inside as much as its outside. For appliqués, the wrong side of the base fabric will show all the stitching and adhesive. The cleanest finish is to line the garment, which covers everything. If lining isn't an option, consider using a facing or applying a piece of self-fabric or lightweight fusible interfacing over the back of the appliquéd area to encase the threads and create a smooth interior. For overlays, serging or binding the seam allowances that include the lace layer will prevent fraying and add durability.
Never let raw lace edges scratch the skin. A common finish in lingerie is to use a cover stitch or a fold-over elastic that encapsulates the lace edge, making it both functional and comfortable. Exploring industrial finishing techniques for intimate apparel can provide insights into scalable, neat solutions.
Conclusion
Applying lace beautifully is a holistic process. It starts at the design table—choosing a lace type and weight compatible with your base fabric. It continues through careful preparation and selection of the right adhesive and stitch. It ends with a thoughtful finish that considers both aesthetics and wearer comfort.
Don't be afraid to experiment on samples first. The cost of perfecting your technique on a half-meter of fabric is trivial compared to the cost of rejecting a bulk production run. And remember, your fabric supplier is a resource. Ask us at Shanghai Fumao for application advice specific to the lace you're buying; we've likely seen it used in countless ways and can offer practical tips.
Ready to transform your designs with flawless lace application? Start with the right foundation. Contact our Business Director, Elaine, at elaine@fumaoclothing.com to discuss your project. Share your design vision and challenges, and let our team help you select the perfect lace and provide technical guidance to ensure its application is nothing short of spectacular.